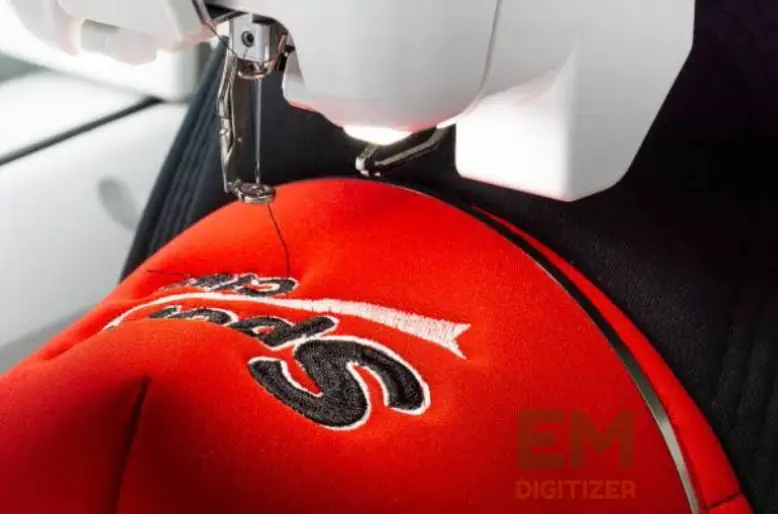
To be a successful embroidery digitizer, you should excel in the push and pull compensation technique. It provides a base for fabric-producing quality embroiderer designs accurately. In this article, we delve deep into the concept of push and pull compensation, what should be the stitch length for a wide range of garments and stitch types, and how it brings a new transformation in machine embroidery.
Indice dei contenuti
Attiva/disattivaServizi di digitalizzazione del ricamo
Se stai cercando servizi di digitalizzazione del ricamo, EMDigitizer è una delle migliori aziende di digitalizzazione del ricamo. Fornire tutti i tipi di digitalizzazione del ricamo Servizi. Ti consiglio di provare a digitalizzare i servizi.
Ordina adessoOttieni un preventivo gratuitoPanoramica
In the broad field of digitizing, you need to be skillful to produce exact designs as you receive a digital format. It might be tricky to recreate all the parameters of the pattern exactly on the number of fabrics with a variety of stitches. However, it is possible to keep an equilibrium between the pulling and pushing force applied during the machine embroidery. In hand embroidery, you can create stitches manually but it demands more care and time. This is where digitizing makes this process easy. Some software helps in stitch formation by keeping the density right, especially for complex patterns. In this technique, digitizers decide which stitch length works best as they are familiar with different fabric properties.
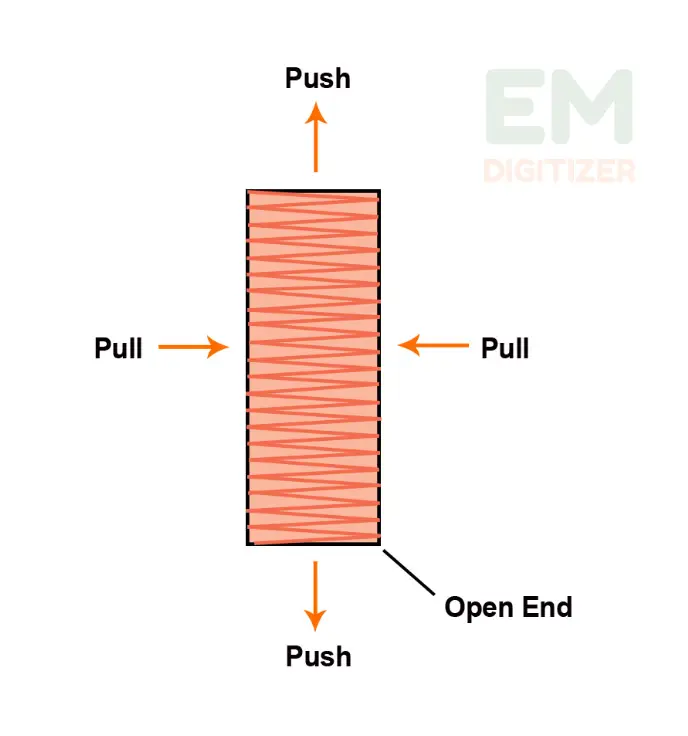
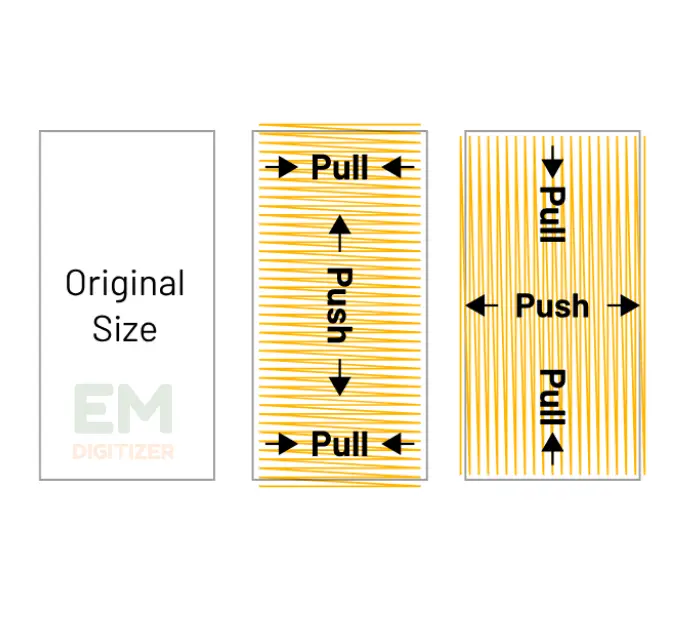
We all know about the game of upper and bobbin thread in machines. They coordinate but on the reverse side to form a stitch and here, setting the right tension between threads does the job of getting a perfect result. Tension is the factor that determines how loose or flat our embroidered patterns are sewn over fabrics. In a similar scenario, working on top and bottom threads to produce loose or compact designs is referred to as a pull and push compensation. Let’s explore these terms in detail.
A complete guide to push and pull compensation
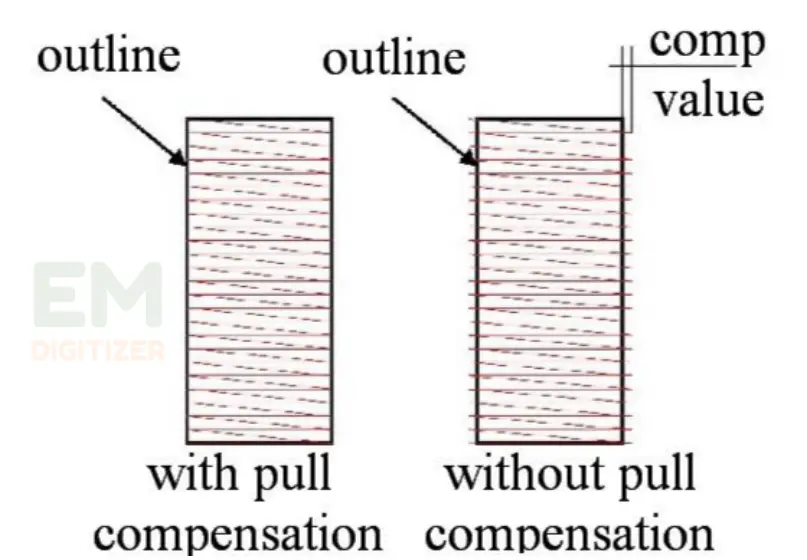
If you are not getting the exact results you see in the graphic, you must learn about this method. After this, you will be able to observe the clear difference in the final look of your artwork with or without applying this method.
Pull compensation
If you tend to work on tricky garments like knit or polyester, being a digitizer, you have to reduce the stitch length for a pulling effect. Due to the flexible fabric, after putting this stitch, the fabric won’t distort the stitching pattern to maintain the design look.
Push compensation
In the case of cotton fabrics, using complex or intricate patterns pushes the fabric resulting in bunching. For digitizing, keep the stitch density high so that the pushing of fabric won’t deteriorate the visual look of the artwork. If this feature is not available in your software program, you can set it manually but it requires practice.
Push and pull compensation rules for satin stitch
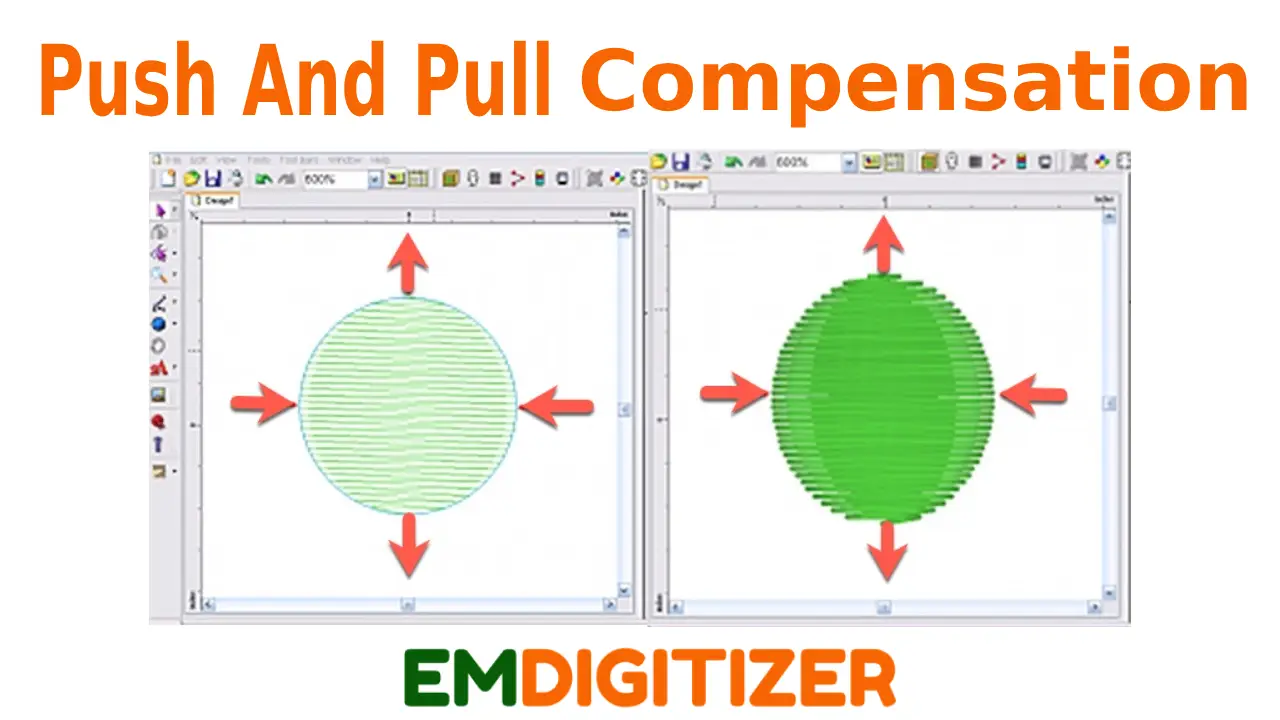
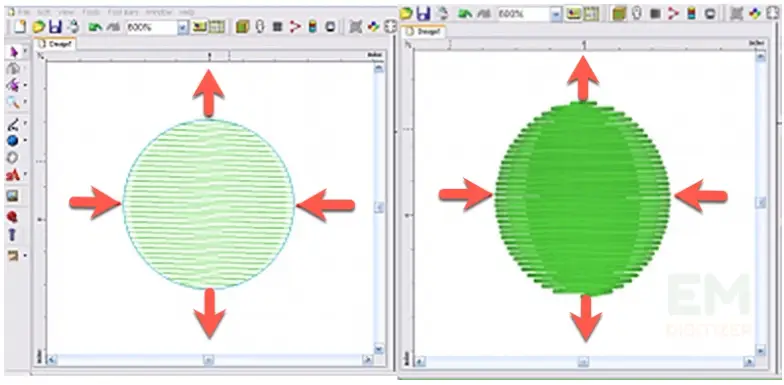
Let’s start digitizing a simple circle to check how to set perfect compensation as in the given picture.
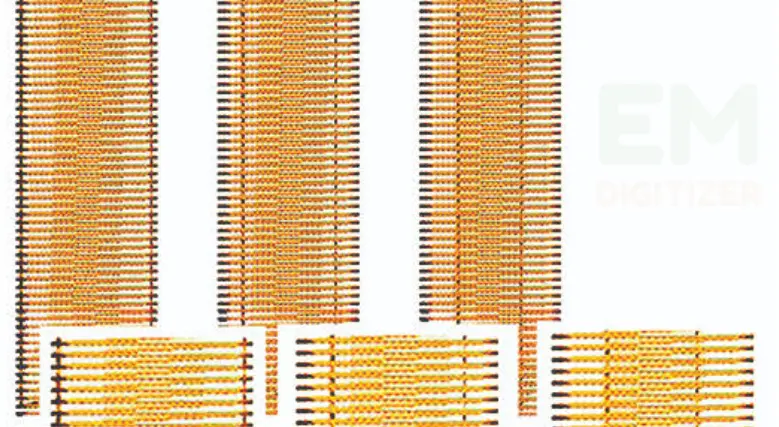
Consider making a design with a satin stitch. If you keep the length long, it causes more pulling effects. So, start following the design direction first to make the perfect shape like the above circle. Now this design is ready to go to your machine, and the second picture is the actual representation of a circle that turns into an oval-shaped egg. It is due to compensation forces that distort embroidered patterns.
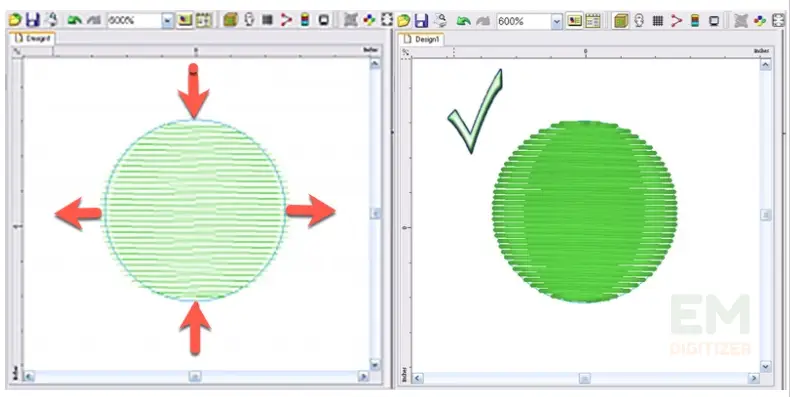
In another try, cut the ends from upside down and expand the points in both directions around the stitch. When you stitch out these points, it will result in a perfect circle shape that compensates for the pulling effect.
For fill stitch:
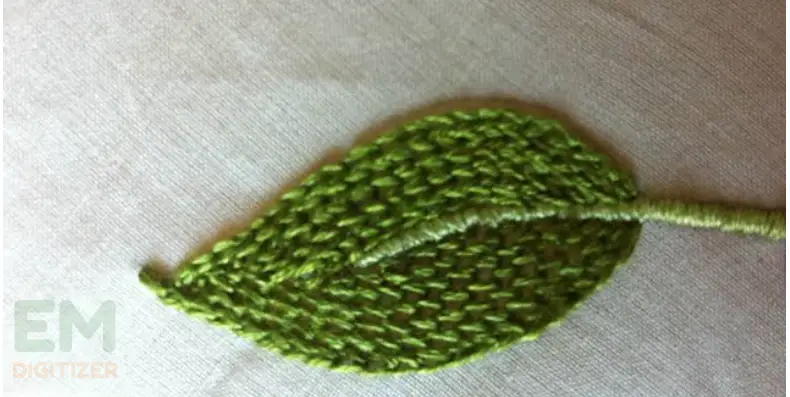
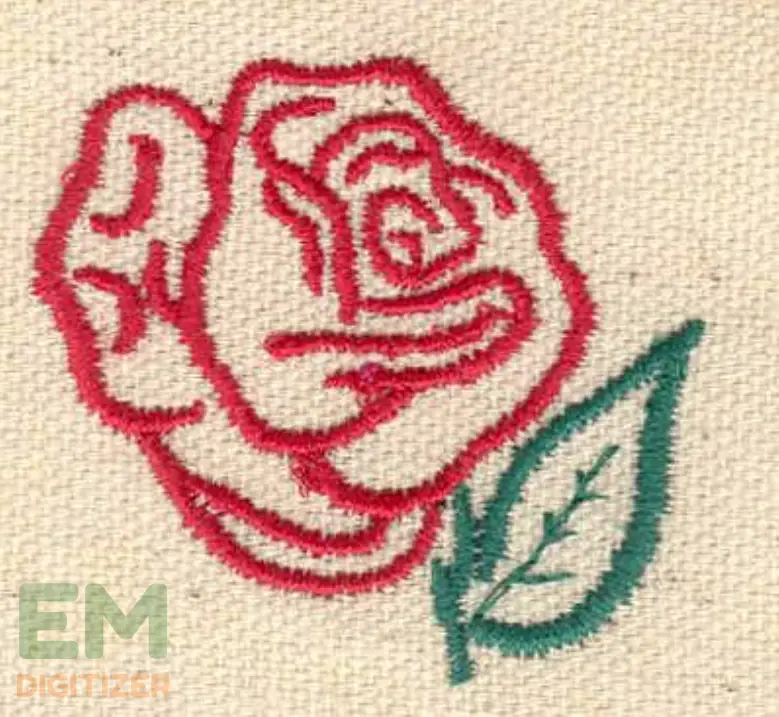
You have to be very careful in setting the fill stitch that you use to cover any design element. It is worth saying that filling requires more stitches than other stitch types hence affected greatly by push and pulling forces. So it is better to put a border or frame around any filling area, which could be petals of any floral pattern or any letter.
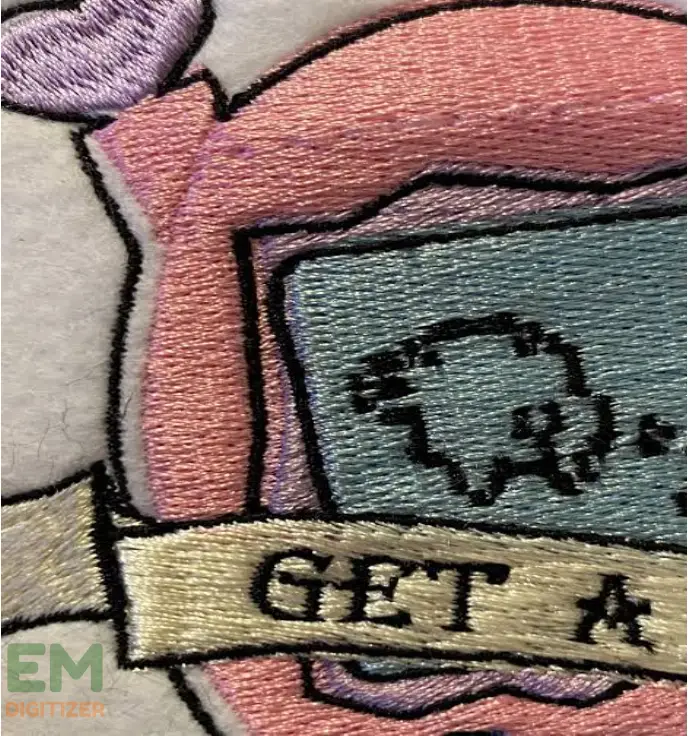
Before digitizing the boundary of the satin stitch or overlapping around the filling element, be mindful of the setting to avoid sequence issues. If you are worried about how we would know the right setting, test your setting on Scrape first. If you see fabric showing between fill and satin stitch, it means you haven’t set it right because of the pulling nature of the fabric.
To avoid this, cut out the ends of the design and make sure they match with each other. Then increase the amount of overlapping in stitch directions that cover all the fabric surfaces that make the design only rather than the fabric beneath. In the last step, fill the design near the edges of your satin border to compensate for any effect of any type of fabric.
In the case of lettering:
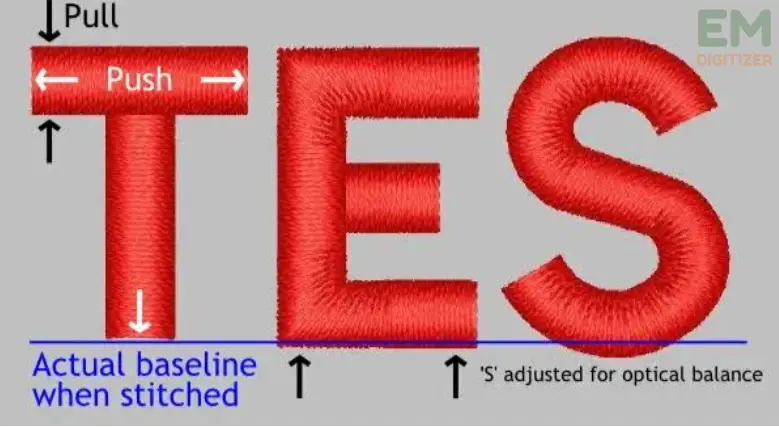
This technique is also important to practice if you wish to embroider letters on your favorite article. The flawless text with equal letter alignment is simply due to pull and push compensation.
It serves as a foundation for the letters’ shape and prevents the design from looking messy or substandard. It only depends on how many skills the digitizer has. For best results, choose Wilcom ESA fonts that do not change the appearance despite scaling features.
Factors affecting the compensation
Keep in account the points that decide that help in choosing the right compensation setting.
Fabric choice:
Your choice of fabric greatly affects the pull and push compensation as every fabric has a different nature and reacts differently. So be mindful of choosing the right stitch length and density depending on the fabric properties.
Embroidery stitches:
The amount of pull and push compensation also differs with stitch types. If you want a flawless embroidered masterpiece, make sure to learn to use the right stitch in the right place of design.
For more details, you can visit our blog to learn the use of embroidery stitches and their features.
How do pull and push compensation Revolutionize embroidery patterns?
This method paves a new way of dealing with all types of fabrics regardless of their soft and stretchy nature. Now, there is no limit to digitizing any pattern for either denim or knit fabric thanks to this technique. You can set proper stitch length keeping in mind the fabric’s nature and quality, you will be amazed to see how digital patterns sew exactly what you want without poor registration.
Invest in high-quality software, apply the right stitch length, and let your machine run the game with each stitch. This compensation technique amazed you with every flawlessly crafted quality embroidered pattern without fabric bunching and damage.
Conclusione
In the era of digital transformation, you can turn every graphic into a piece of art with a pull-and-push compensation game. It makes the digitizing process easy for simple to complex patterns and typography regardless of fabric type. If choosing the right setting turns into a good-quality pattern, going wrong does the reverse. Make sure to follow the rules and tips stated above and have fun making creative machine embroidery projects.
Knowing the fact that every garment responds differently to the type of pattern, setting the right stitch length is all that makes the difference. Keep it short for tricky garments to compensate for pulling force. Keep the stitch length lather to compensate for pushing nature with drinkable cotton clothes for better results.
Regardless of fabric weight and its response to carrying stitches, you can digitize patterns easily by leaving some gaps to hold pull and pushing forces to do their job. It helps to keep the alignment of letters correct and ensure good-looking embroidery without a saggy appearance.
Cut out the ends of the design and make sure they match each other. Then increase the amount of overlapping in stitch directions that cover all the fabric surfaces that make the design only rather than the fabric beneath. In the last step, fill the design near the edges of your satin border to compensate for any effect of any type of fabric.
Se hai domande lascia un commento oppure puoi visitare il nostro canali sociali per ulteriori aggiornamenti regolarmente. Noi forniamo servizi di digitalizzazione del ricamo se hai bisogno di servizi di digitalizzazione, sentiti libero Contattaci O Mandaci una email.

