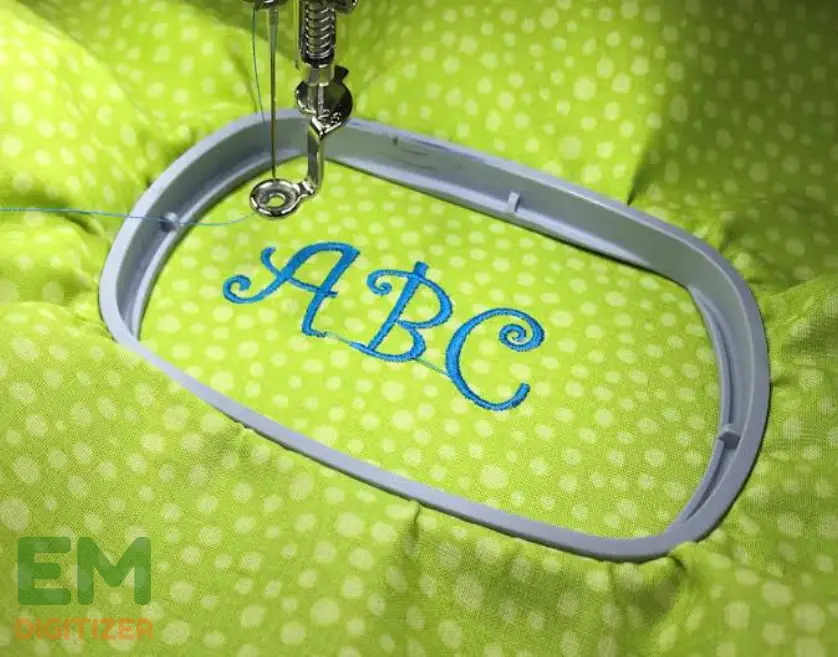
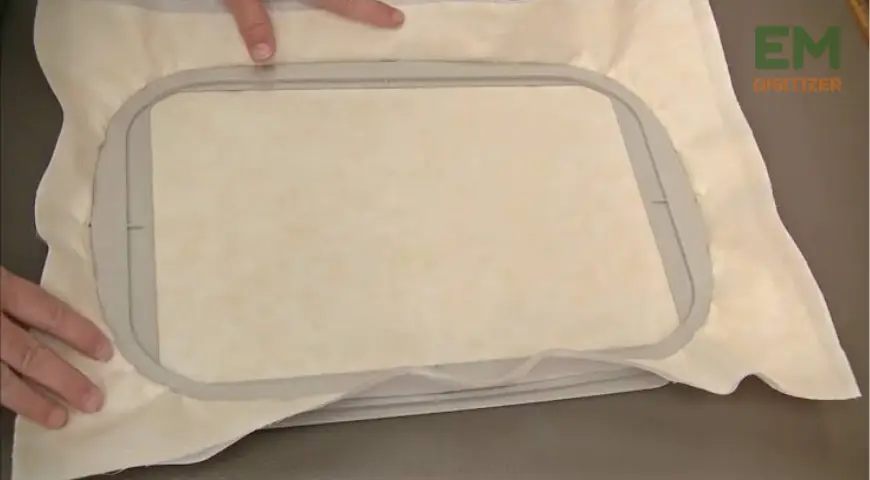
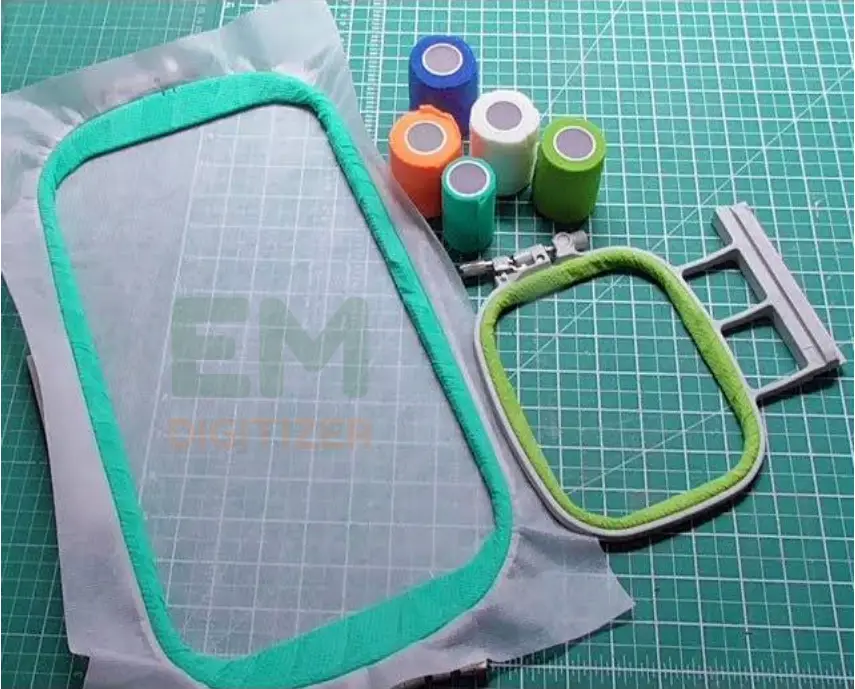
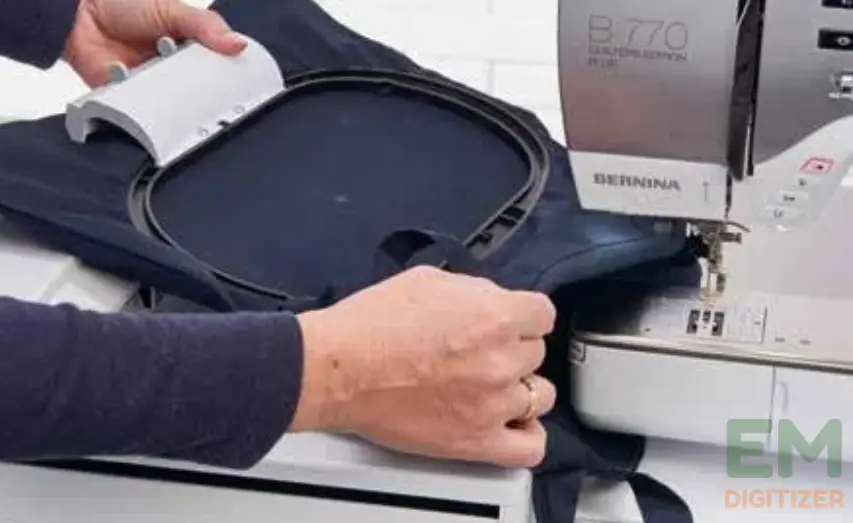
Welcome to our embroidery blog where we’ll explore ” how to use embroidery hoop”. We’ll reveal the tips and tricks that lead to perfect stitches. Whether you’re new to embroidery or a pro, this guide will be your trusted companion in the exciting world of stitching.
Table of Contents
ToggleEmbroidery Digitizing Services
If you are looking for embroidery digitizing services, EMDigitizer is one of the best embroidery digitizing companies. Providing all types of embroidery digitizing Services. I recommend you try digitizing services.
Order NowGet Free QuoteConcept Of Embroidery Hoops:
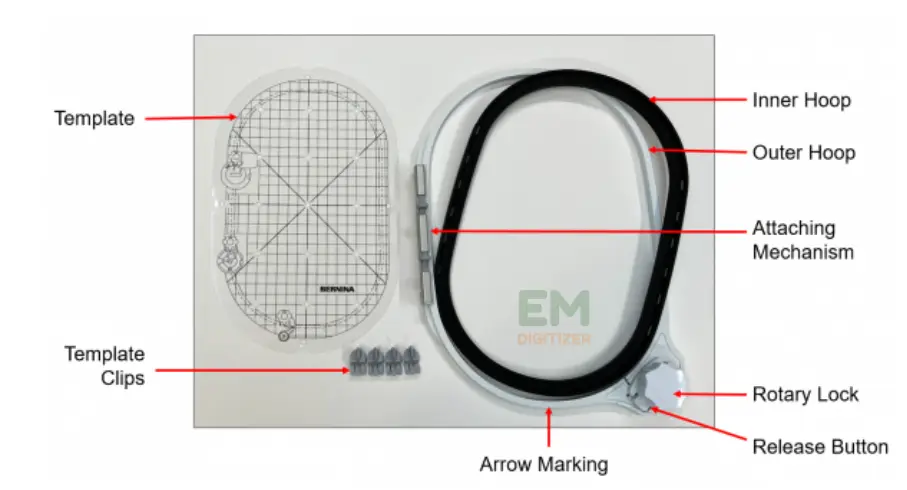
Embroidery hoops consist of two main parts: an inner and an outer ring. The inner ring, often referred to as the “hoop,” is the smaller of the two, while the outer ring, known as the “frame,” is slightly larger.
These two rings fit together, and you place your fabric between them. Once your fabric is secure, you can tighten a screw or a metal clasp on the frame to hold the fabric taut.
I’ll share with you a real-life example. My grandma, who’s a master embroiderer, showed me how to use an embroidery hoop. She took this old, plain handkerchief and an embroidery hoop.
She stretched the handkerchief over the inner hoop, just like you’d put a rubber band around your wrist. Then, she gently pressed the outer hoop over it, securing the fabric.
The result was amazing! With the fabric stretched in the hoop, she could easily create beautiful flowers and butterflies on the handkerchief.
If she hadn’t used the hoop, the fabric would have been all crumpled, and the embroidery wouldn’t have looked half as good.
Types Of Embroidery Hoops:
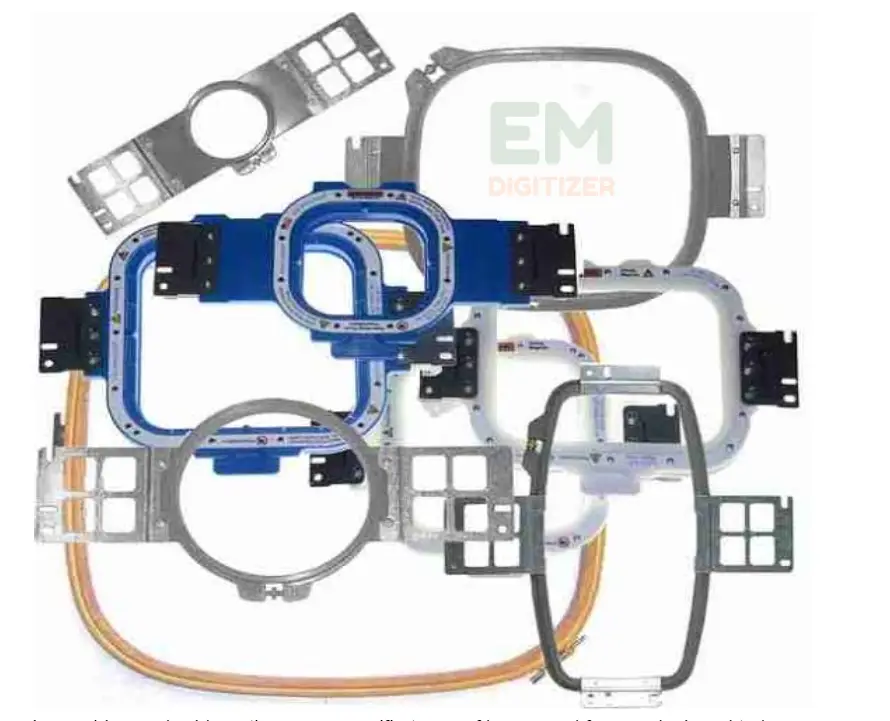
In machine embroidery, there are specific types of hoops and frames designed to be used. These hoops and frames vary in size, shape, and function to accommodate different types of machine embroidery projects.
Have a look at the common ones:
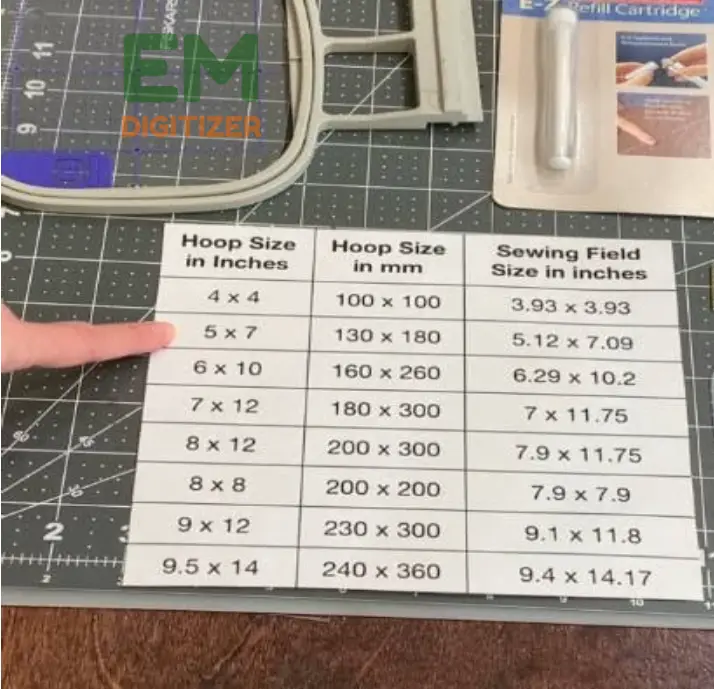
For complete guidance about the mighty hoop size chart, read this blog.
Standard Embroidery Hoops: The most common machine embroidery hoops come in different sizes, usually square or rectangular. They’re made for regular embroidery work. These hoops have two parts, an inside and an outside hoop, which hold the fabric in position.
Round Embroidery Hoops: These hoops are circular and are ideal for designs that require rotation or for embroidering on round or cylindrical objects, like hats or sleeves.
Magnetic Embroidery Frames: They use magnets to gently hold your fabric in place. This is handy when you’re working with soft fabrics because you don’t need to squeeze them too hard with clamps. Your fabric stays safe and snug with a little magnetic help.
Here’s how one can use magnetic embroidery hoops effectively.
Hoopless Embroidery Attachments:
These let you do embroidery without the usual hoop. They work well for big projects or materials that can’t fit in a regular hoop.
Cap Frames: Cap frames are made just for adding designs to caps and hats. They keep the cap still, so you can easily embroider on the curved part.
Multi-Position Hoops: These hoops let you embroider many designs on one piece of fabric without needing to take the fabric out and put it back in again.
Border Frames: Border frames are extra-long, rectangular frames that work well for embroidering border designs or patterns that keep going without interruptions.
Free-Arm Hoops: Such hoops are for sewing and embroidery machines with a special free-arm part. They’re excellent for embroidering on small, tube-like things such as cuffs and sleeves.
Monster or Jumbo Frames: These extra-large frames are used for embroidering oversize designs or for handling very large projects.
There is complete information in this blog about fast frames and their uses.
Selecting the appropriate embroidery hoop or frame in machine embroidery hinges on the particular project and design demands. Diverse hoops provide varying advantages concerning their size, ease of utilization, and specialized functions.
That’s why people who love embroidery often have different hoops to match their needs when learning “how to use embroidery hoops”.
Why Do You Need Embroidery Hoops?
Are you wondering about “how to use embroidery hoops”? Look no further. Embroidery hoops are essential tools for any embroidery enthusiast. Let me share with you why embroidery hoops have become my trusty sidekick and why you need them too.
Tension Control:
Imagine trying to paint a picture on a canvas that keeps wrinkling and moving around. That’s what stitching without a hoop feels like.
Embroidery hoops hold your fabric taut, ensuring a smooth and even surface to work on. No more frustrating wrinkles!
For example, I was working on a delicate floral pattern, and the petals just weren’t coming out right. With an embroidery hoop, I stretched the fabric perfectly, and suddenly, each stitch flowed seamlessly.
Check out the details about thread tension control during embroidery for spotless results.
Stitch Precision:
Have you ever tried to make precise, tiny stitches without a hoop? It’s like trying to thread a needle in the dark. Hoops provide stability, allowing you to control each stitch with precision.
When embroidering intricate lettering for a custom gift, the hoop kept my fabric steady, ensuring every letter looked sharp and legible.
Reduced Hand Fatigue:
Embroidery can be a labor of love, but it can also be tough on your hands. Hoops make stitching more comfortable by providing a stable frame to grip, reducing hand strain during long projects.
During a marathon stitching session, I realized my hand didn’t hurt as much as it used to. Thanks to the hoop, I could enjoy my craft for longer stretches. You can also enjoy learning “how to use embroidery hoops” for better outcomes.
Project Portability:
Hoops are like mini workstations you can carry anywhere. They make your embroidery projects portable, so you can stitch on the go or bring your work to a cozy spot in your home.
I took my embroidery hoop for a weekend getaway, and I ended up finishing a lovely floral design while relaxing by the lake. It made the trip even more memorable.
Consistent Results:
Using embroidery hoops, you may achieve constant tension and outcomes across the whole activity. No more uneven areas or wonky lines can happen when working without one. When I embroidered a border on a tablecloth, the hoop ensured that the pattern looked uniform all the way around, giving it a professional touch.
Easier Handling Of Smaller Projects:
Embroidery hoops are especially handy for small projects. They keep your work confined to a manageable space, making it easier to manipulate the fabric.
E.g, Creating a custom greeting card with a small embroidered design is a breeze when you learn how to use embroidery hoops. It keeps your work area small and controlled.
A Complete Guide On How To Use Embroidery Hoop:
Whether you’re just starting or have been stitching for a while, knowing how to use embroidery hoops is important for making great embroidery. In this complete guide, we’ll take you through it step by step and give you a simple example to help you get the idea.
Step 01:
Before you start with embroidery, make sure you have all the stuff you need. You’ll want an embroidery hoop, your fabric, needles, embroidery thread, scissors, and the design you want to embroider. For our example, let’s say you’re planning to embroider a colorful flower design onto plain cotton fabric.
Step 2:
An embroidery hoop has two parts: the inner hoop and the outer hoop. First, unscrew the outer hoop to separate them. Next, put your fabric over the inner hoop, making sure your design is in the middle.
Now, put the outer hoop over the fabric and press it down to make the fabric nice and tight. Finally, tighten the screw on the outer hoop to keep the fabric secure. Think of it like making a drum’s canvas super tight. That’s how it should feel.
Step 3:
When you’re picking thread for your embroidery, you’ve got lots of colors to choose from. In our example, let’s choose bright colors that go with the flower design.
Take your embroidery needle and put the thread through its eye. Then, tie a little knot at the end to stop it from coming loose when you’re stitching on the fabric.
Step 4:
Once your fabric is firmly held in the hoop, it’s time to start embroidering. Look at your design and pick the first color you want to use. Let’s say we’re beginning with the flower’s petals.
Put your needle through the fabric from the back to the front, following the lines in your pattern. Pull the thread through, but leave a little bit hanging at the back.
Keep sewing and try different embroidery stitches like the satin stitch or backstitch, following the instructions in your pattern.
For the best embroidery hooping guide, go through the blog.
Step 5:
Once you’re done with your design, take the fabric out of the embroidery hoop. Carefully cut off any extra fabric and loose threads. Your beautiful flower on the plain cotton fabric has turned into a masterpiece!
When And How To Switch Between Different Hoops Or Frames During A Project:
Switching between different hoops or frames during an embroidery project might seem like a daunting task, but with the right knowledge of “how to use embroidery hoops,” it becomes a breeze. Let me share my experience.
When tackling a larger or more complex embroidery project, knowing when and how to switch hoops is crucial
Here’s a scenario: I was working on a beautiful quilt that featured various embroidered blocks.
- Each block had its unique design, and some were larger than others.
- To maintain the quality of my work and make the process efficient, I had to switch between different hoops.
When To Switch Hoops:
Depending on the size and positioning of the pattern, you may want to switch hoops. Whenever your design extends beyond the boundaries of your current hoop, it’s time to consider switching.
For instance, if you’re embroidering a large floral pattern on a quilt square, and the design extends beyond the hoop’s capacity, switching to a larger hoop is necessary.
How To Switch Hoops:
Changing hoops might seem daunting, but it’s simpler than you think. Here’s how to do it:
- Stop the embroidery machine when it’s safe to do so, typically at the end of a section or color change.
- Remove Loosen the screw or latch and carefully take out the current hoop with the fabric.
- Position your fabric for the next section and insert it into the new hoop.
So, knowing when and how to switch hoops or frames is like having different tools in your toolbox for the right job, ensuring that your embroidery project looks fantastic from start to finish.
Timing is crucial when a project is started. Imagine that you are embroidering a colorful scene and using a sizable hoop to finish the beautiful mountains in the distance.
Tips On Maintaining Embroidery Hoop For a Long Time:
Keeping your embroidery hoop clean and well-maintained is essential for making it last a long time. Here are some easy tips:
- Dust your hoop regularly using a soft, dry cloth. This keeps dirt and grime from building up.
- Don’t let your hoop get wet. Moisture can damage the wood or metal. Store it in a dry place.
- If your hoop gets dirty, clean it with a damp, not wet, cloth. Wipe gently and then dry it completely.
- When you use your hoop, tighten it carefully. Don’t over-tighten, as it can stress the hoop’s components.
- When you’re not using your hoop, store it in a cool, dry place, away from direct sunlight. This prevents warping or fading.
- Don’t use strong cleaning chemicals or solvents on your hoop, as they can damage the finish.
By following these easy tips, you can ensure that your hoop stays in good shape and lasts for many embroidery projects to come.
Conclusion
Understanding “how to use embroidery hoops” is a valuable skill for any embroidery project. By practicing and using the right methods, you can make beautiful and detailed designs.
No matter if you’re just starting or you’ve been embroidering for a while, the embroidery hoop is like a trusted sidekick on your creative adventure. So, grab your stuff and begin crafting your masterpiece today!
Your machine works best with certain hoop types and sizes. Check your machine’s manual to know which hoops are okay. The wrong hoop might mess up your machine or make things go wonky.
When you’re working with soft or stretchy fabrics, you need to be extra careful. Pick a stabilizer that matches your fabric, and think about using a cutaway stabilizer for extra help. And make sure not to pull or stretch the fabric too much when you put it in the hoop. This will keep everything in place and look nice.
To pick the perfect size, first, measure the part of your fabric where you’ll do your embroidery. Then, choose a hoop that fits this area comfortably. Be careful not to choose one that’s too tiny or way too big because it can mess up how your embroidery turns out.
If you have any questions leave the comments or you can visit our social channels for more updates regularly. We provide embroidery digitizing services if you need digitizing services feel free to contact us or email us.

