Image Digitizing
$15.00 – $35.00Price range: $15.00 through $35.00
Image embroidery digitizing services
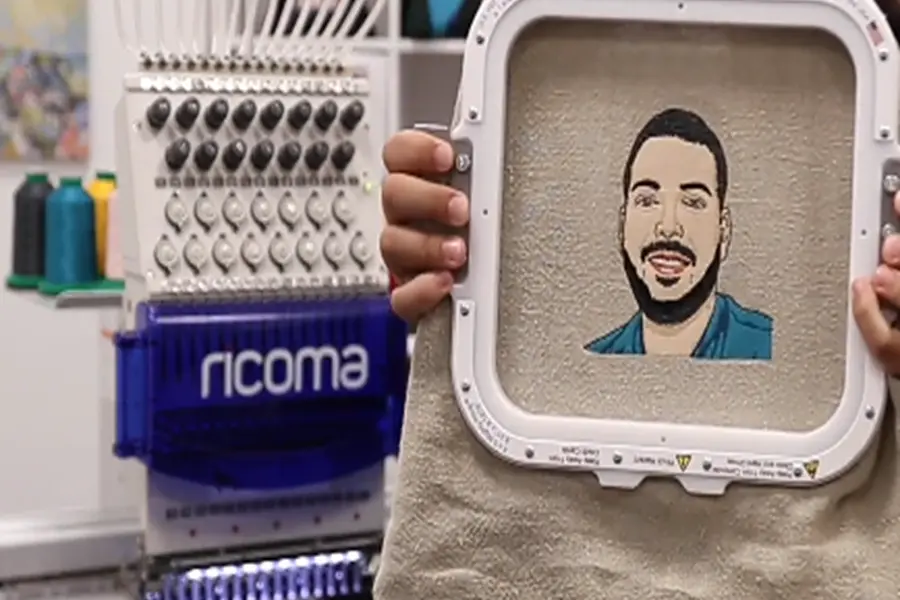
Custom embroidery has both fun and profitable margins for clients and businesses alike. With the advancements in the digital world, it is now possible to transform any picture into embroidery for desired stuff. Emdigitizer is there to provide all kinds of image embroidery digitizing at cheaper prices ($15-$35) and fast delivery (4-12 hours). We can also send you samples to view our exceptional quality realistic results. Get a free quote and order now to transform your loved one’s pictures into an embroidered masterpiece while being on a budget.
Image digitizing
We have a team of professional digitizers who analyze your image and use the best software to create a digitized file. We make sure that your machine easily follows the stitch path assigned in a digitized file. To get our services:
1- Email us clear images in any format such as SVG, JPG, PNG, or Word file. Our team reviews the image clarity and sets its size according to your instructions.
2- By utilizing top-notch embroidery digitizing software, we convert it into a stitch file that includes all details of stitches, color, and trims.
3- We normally take 12 hours to process the design into a final file but we can send it back to you in your desired format within 4 hours if you want urgent delivery.
4- For image embroidery digitizing, we charge $15 to $35 for a simple to detailed image. In case of fast turnaround time, you need to pay an extra $5 with the original price.
How to convert an image to Embroidery file?
If you want to turn an image into a stitch file, follow the procedures below carefully.
Step 01
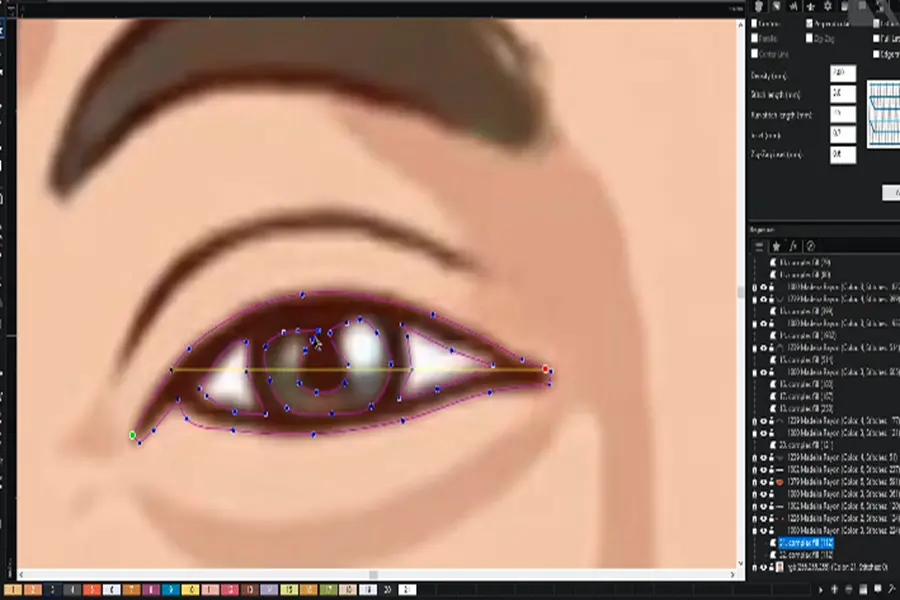
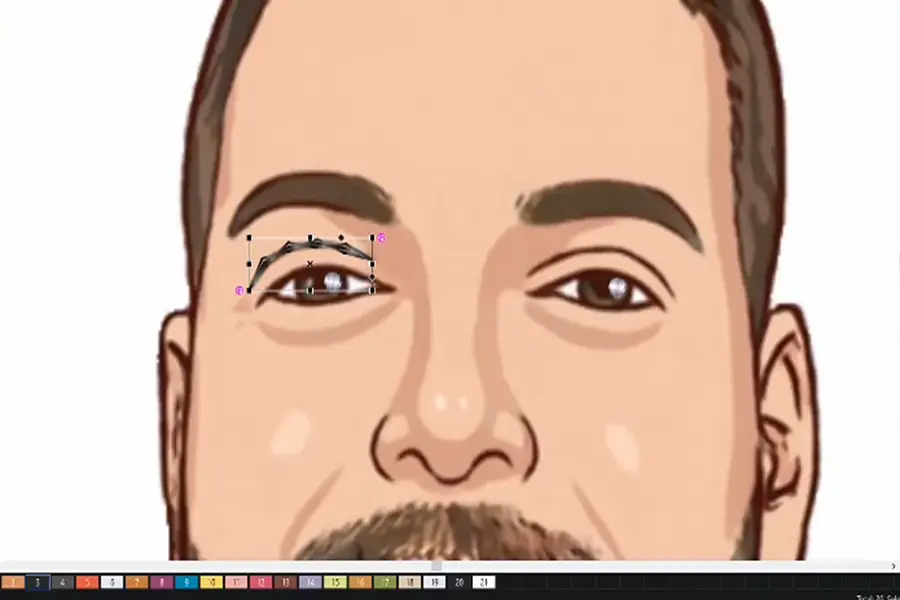
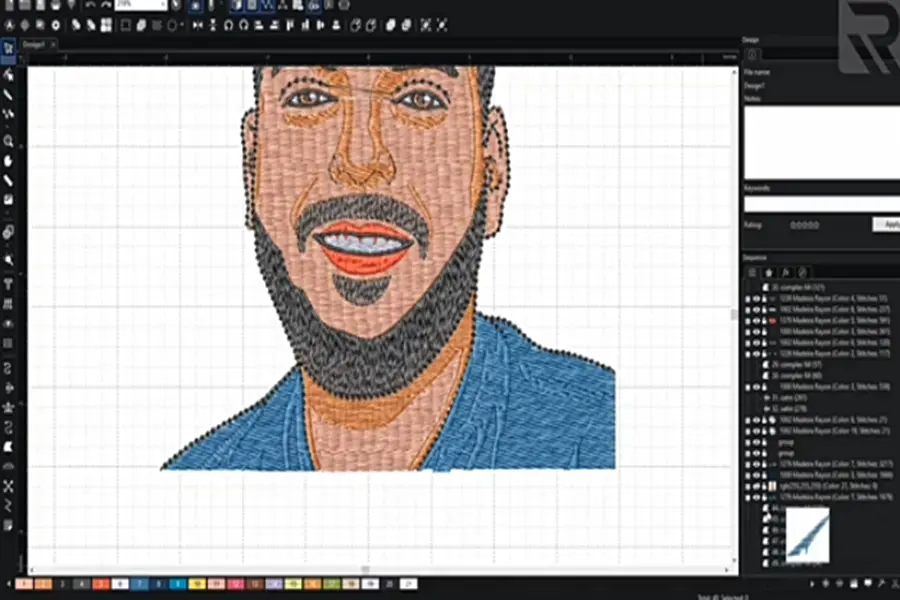
In the first step, we will show you how to convert an Image into a embroidery file for embroidery with Chroma Lux embroidery software. I start by digitizing the eyes, I choose complex fill and make sure to go with the right color.
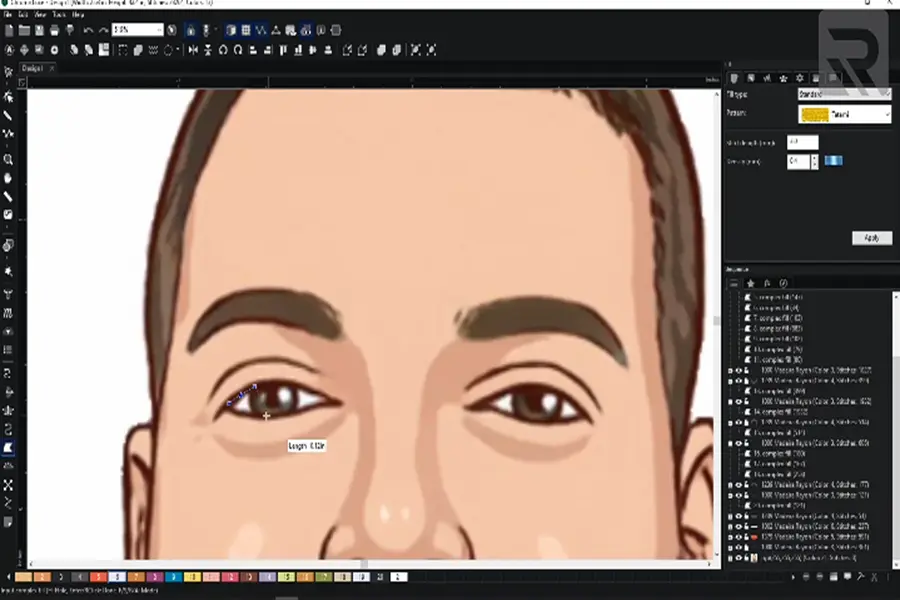
I select white color for the background, and black for adding lines inside.
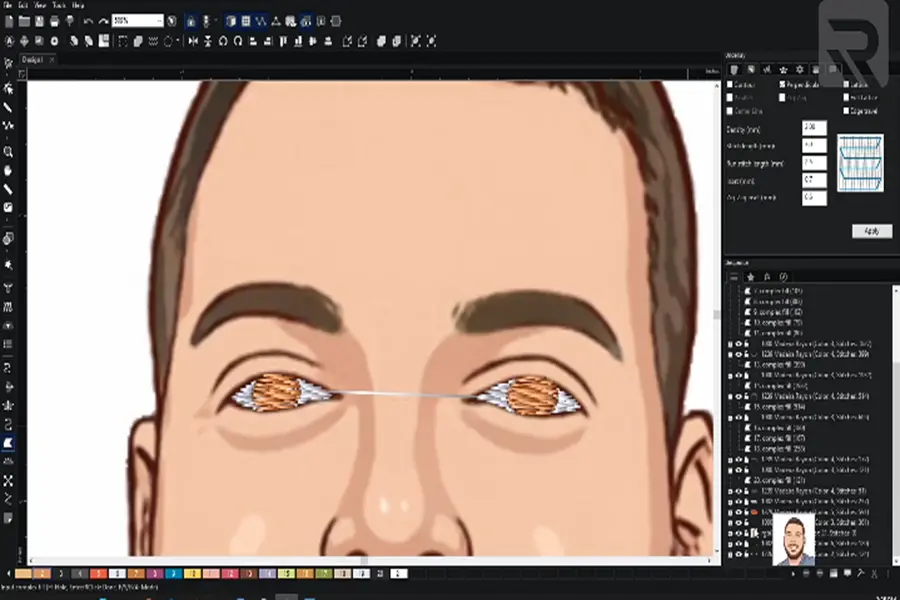
Here, I add a lot of stitches inside this eye. Select the eye one more time to adjust the density which is 0.3, go over to underlay, and deselect it. Now I am choosing black for the outline of the eye, and then the brownish color for the inside.
Step 02- Digitize the eye’s lens
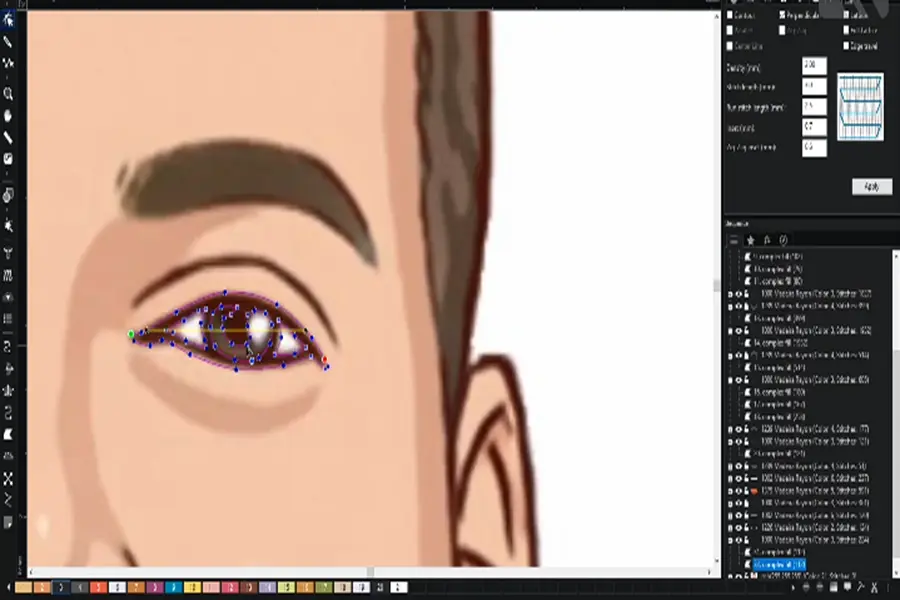
Select complex fill to create the perfect circle for the lens. With the artwork tool, you can later change the stitch into your favorite stitch type. Remember to bring your bitmap over the front to avoid confusion. Again choose the complex fill and convert it into a satin stitch.
Do the same thing as earlier, sleet the complex fill of the right color, so I choose black. Trace it and let go of the control when you don’t need it. Jump to the next eye to fix it.
Select both with the little plus key, and you can see them individually. Click on the first one, go to the snapping tool, right-click on the purple line, and add a hole, a new ear at each side.
Zoom in and delete those points that aren’t needed.
Step 03- Apply satin stitch
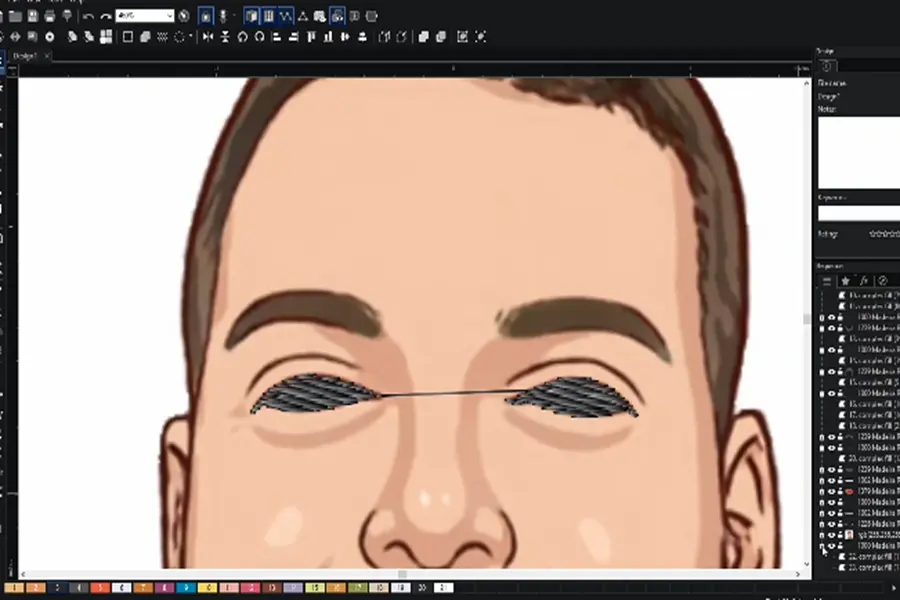
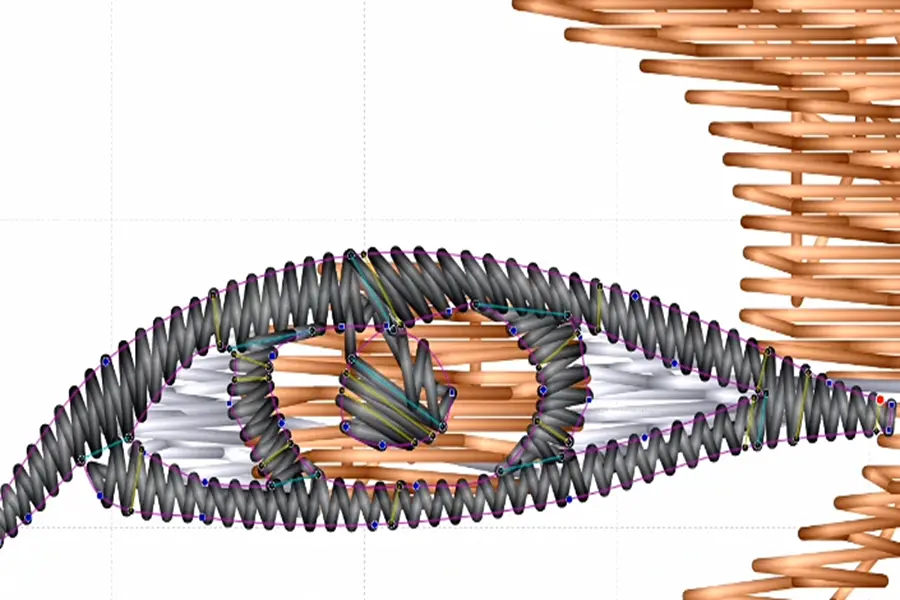
Now both eyes are done and go ahead to convert it into a satin stitch. For this purpose, review the bitmap so you can see clearly into both eyes, do a right-click, and convert it into a satin stitch.
Take an underlay with the density at 0.3, and edit it a little more. Go to the shaping tool and check that there aren’t too many angles or split lines. Remove unwanted split and angle lines and repeat the process on each side for a better look.
Step 04- White part in the lens
We want eyes to look more realistic, so the white area in the eye is important because it does stand out. So, go to the artwork, ellipse, and add it on the top. Now go to the selection tool, right-click, and convert it into a satin stitch to make it more white.
Always make sure when there’s something so small to take out the underlay, put 0.3 density, and just right-click copy and paste and drag it to the other side.
Step 05- Outline
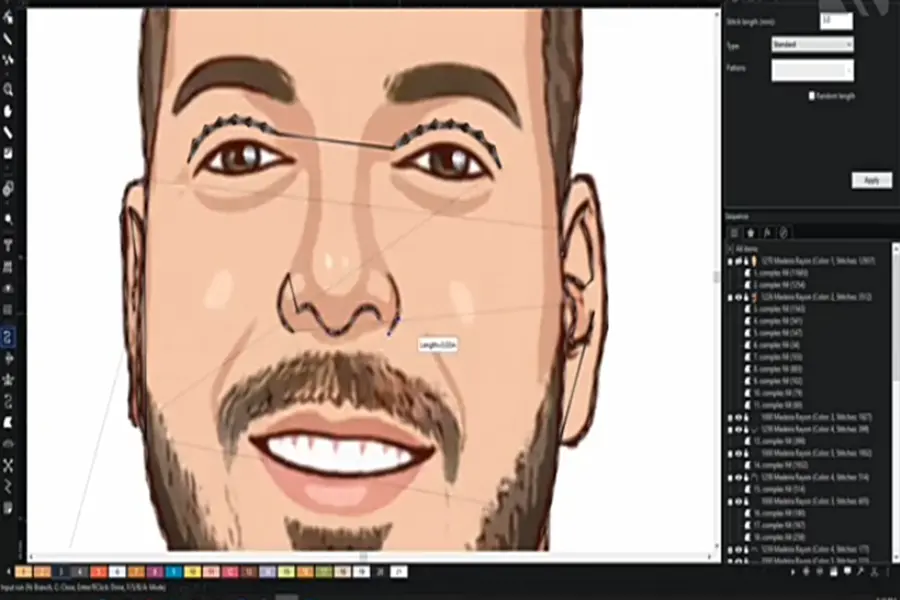
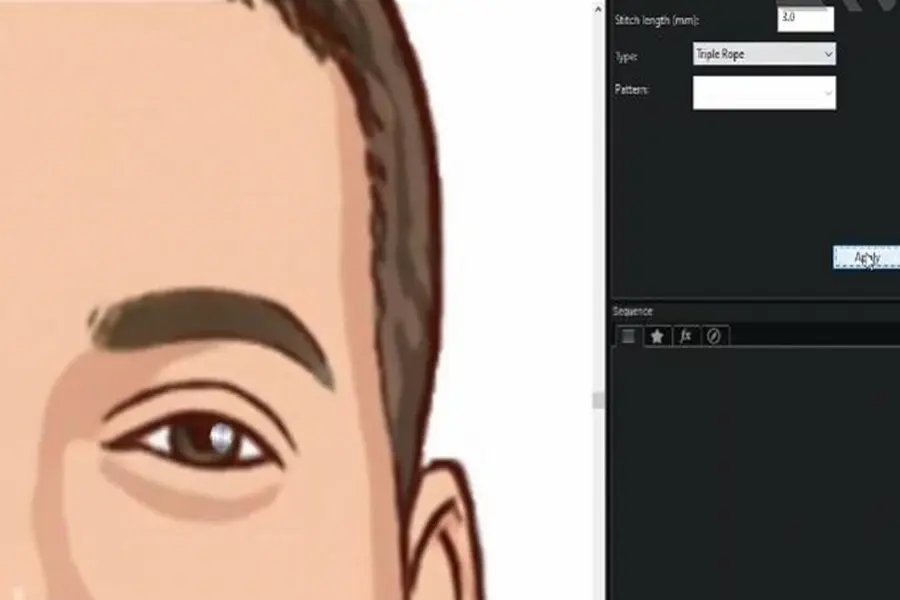
Now, go ahead to finish the outlines. We will make a triple-run stitch for a thick outline. For this purpose, go to the selecting tool, select the stitch type, and click on the triple rope, it will be applied and look like a satin stitch.
Make sure to decrease the stitch length, so set it to 2. Go ahead and trace the outline. Repeat the same thing with the other side of the eye.
Step 6- Trace the outline
Trace the outline by hitting the control button, holding it down whenever you want particular angles, and letting go when you don’t.
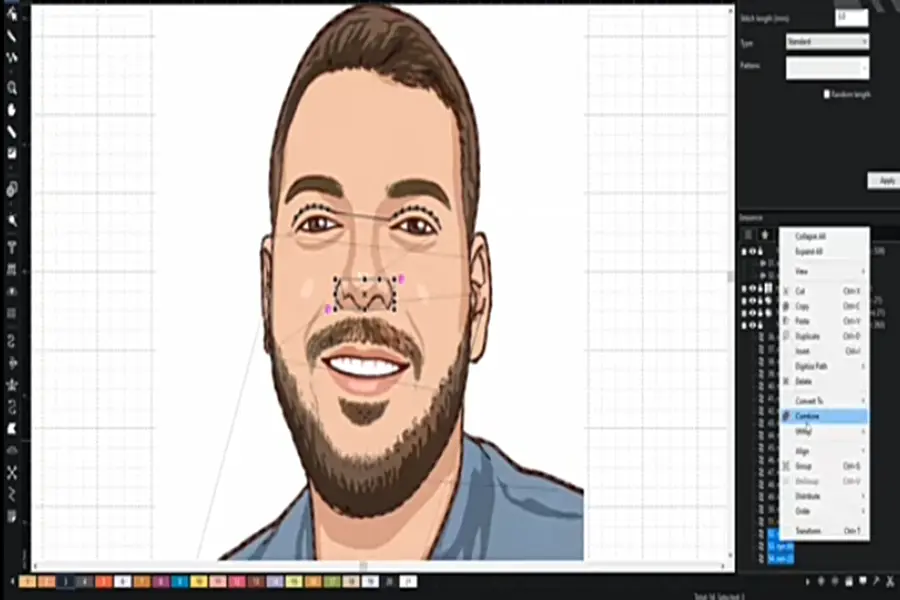
Now select the three points on the nose by pressing the shift button and hold it down to group them to avoid messing with trims. Now select outline points and change them into a triple run by putting 1.5 stitch length instead of 3.
Step 07- Color selection
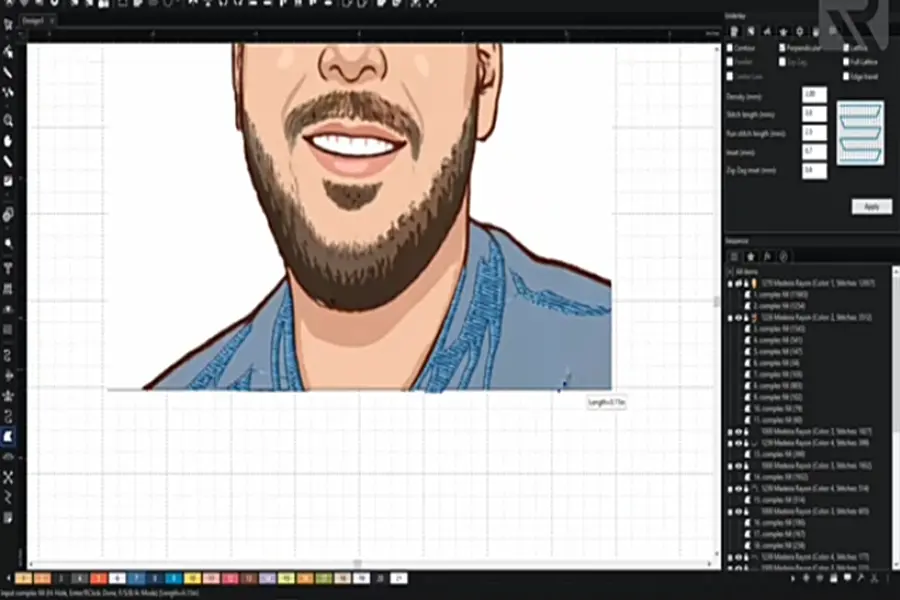
Go to the complex fill one more time select a blue matte color and start tracing it. The outline needs to be in front so select it move to the front on top and keep going with the shade of the shirt. You don’t need to be perfect.
If you are missing something, go back to the skin color and change It to a slightly lighter shade. Don’t worry about colors as we can always change them when we are selecting the thread colors that the machine is gonna use while embroidering the picture. If you don’t want your shade to be the same color as your skin, select it and right-click on a darker color that looks great.
Step 8: Add trims
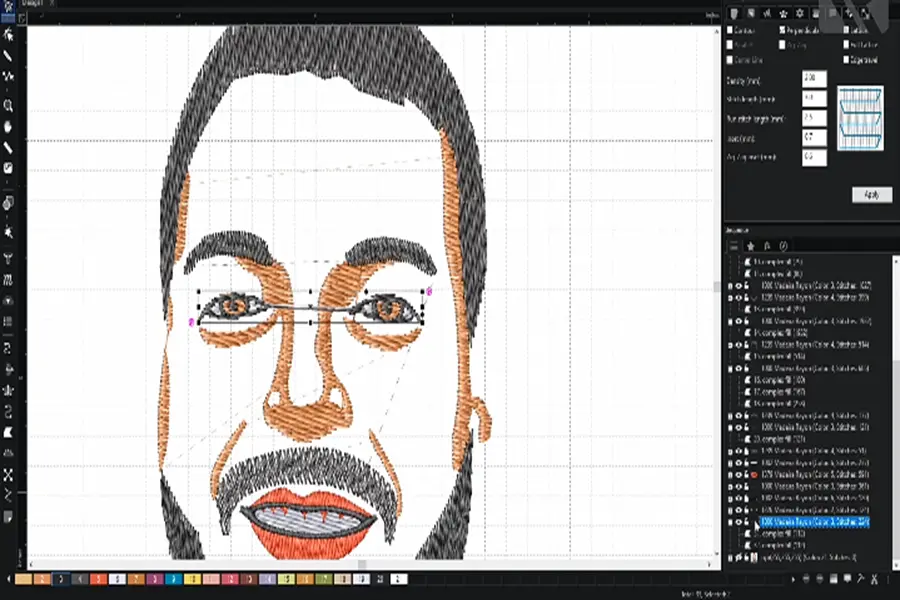
After applying colors, we are on the next step to take out all the transparent lines.
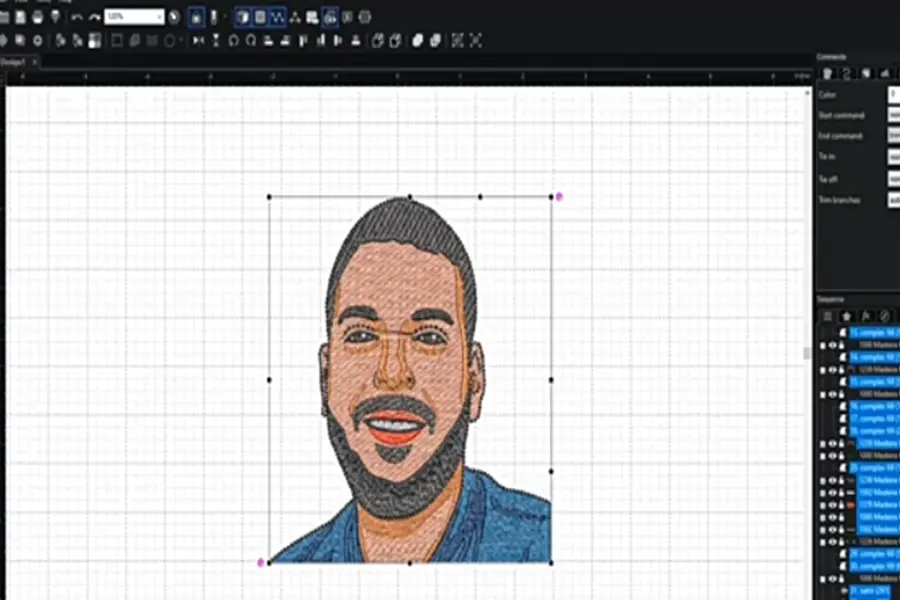
Another way to take them out is to go to the selecting tool, grab your whole design, and go to the command tabs on the right. When I press the apply command trim, all of these lines will disappear. The machine will follow the same steps to give you a neat-looking design.
Step 09- Double-check your setting
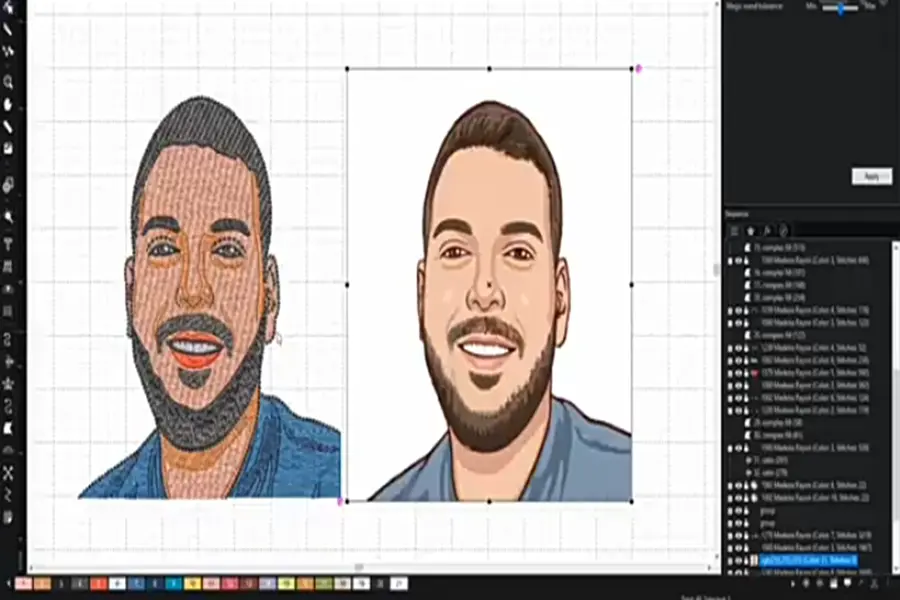
In the last step, check your setting, view the bitmap, and move it to the side by pressing the shift button and clicking on it. If you are missing some details in your design, go to the manual stitches and add some random stitches to add details.
Now, we check that this picture has trim everywhere. Grab this picture and go ahead to add trims so it looks pretty good now.
Step 10- Save as a DST file (Appropriate format)
After checking all the details, delete the bitmap and save the design as a DST file. Now it is ready to take in a machine to stitch it on a desired material.
How do you embroider a real picture?
Once you get your digitized file, follow the steps below to turn it into a realistic embroidery.
Material required:
- Embroidery machine
- Pillow
- Magnetic Hoop
- Cut-away stabilizer
- Embroidery thread and needle
- USB drive
Procedure:
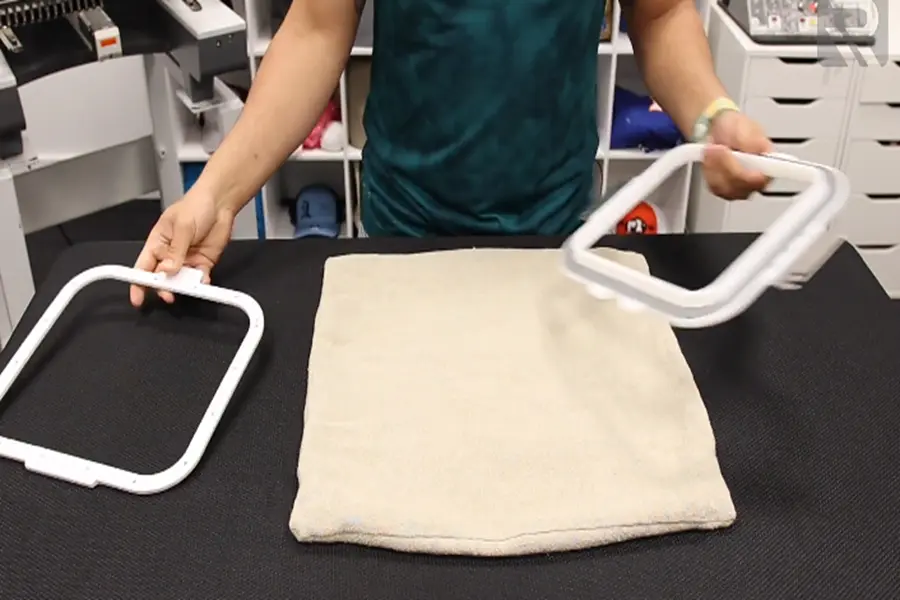
1- I am going to use two sheets of cutaway stabilizer and a magnetic hoop that is flimsy enough compared to a thick one. Do your best to not lose registration while adding the stabilizer and hoop.
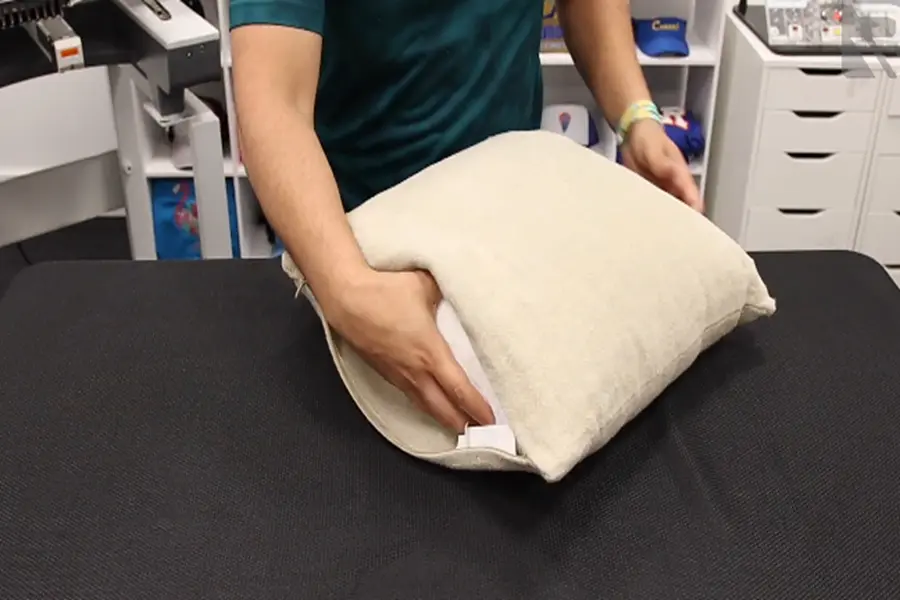
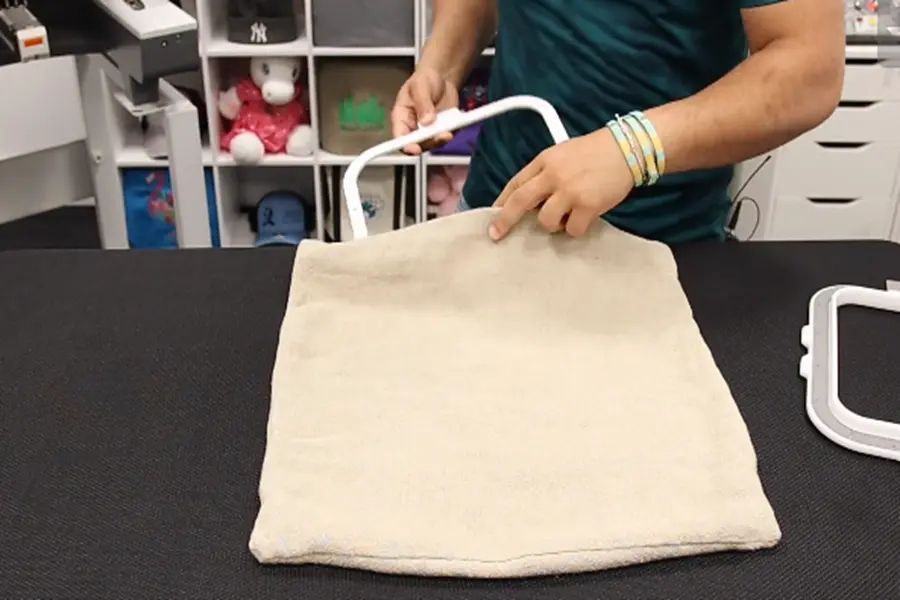
2- Turn the pillow inside out that has a zipper on it to make it more convenient when pulling.
3- Split the hoop in the middle, and take the bottom piece inside the pillow.
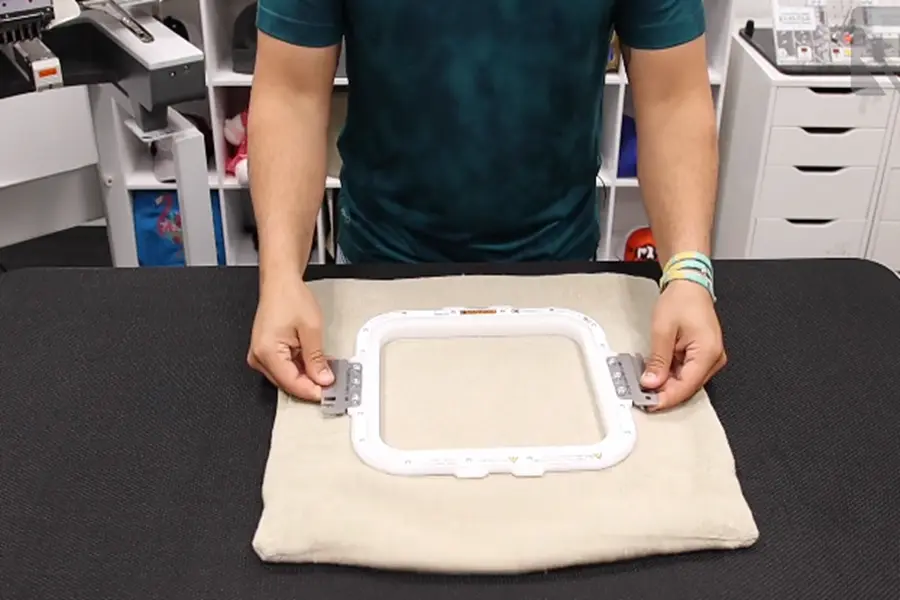
First, hoop the fabric and stretch it as much as you can. Since the design has a lot of complex fills and stitches and underlay, grab the fabric and stabilizer nicely.
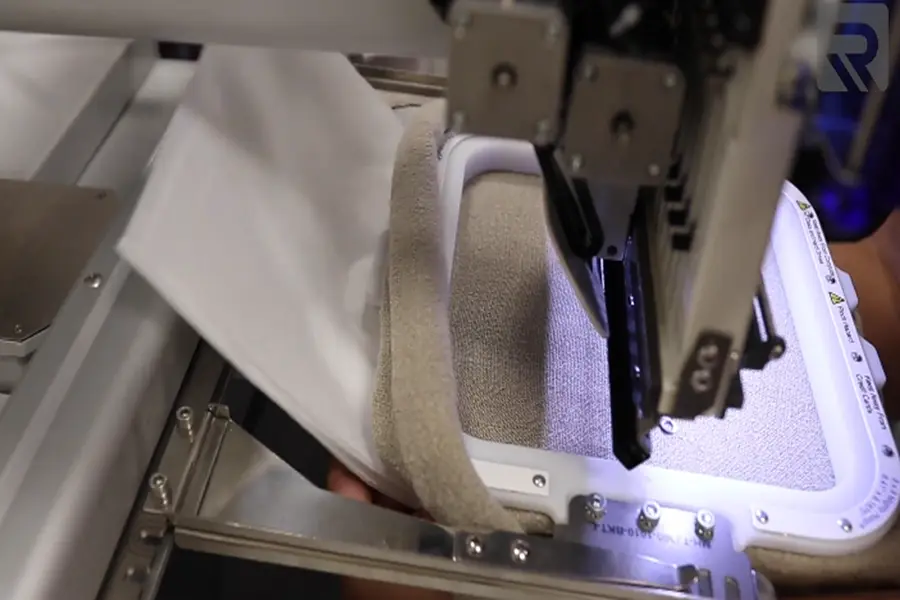
4- Now get the top of the hoop, make sure it is facing away from the sewing arm, and place it on the top of the fabric that is stretched nicely.
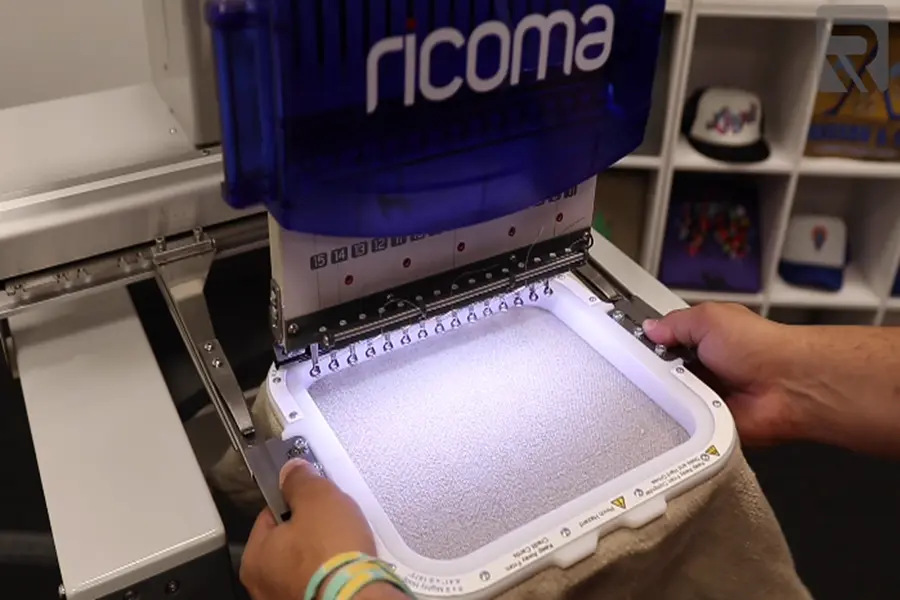
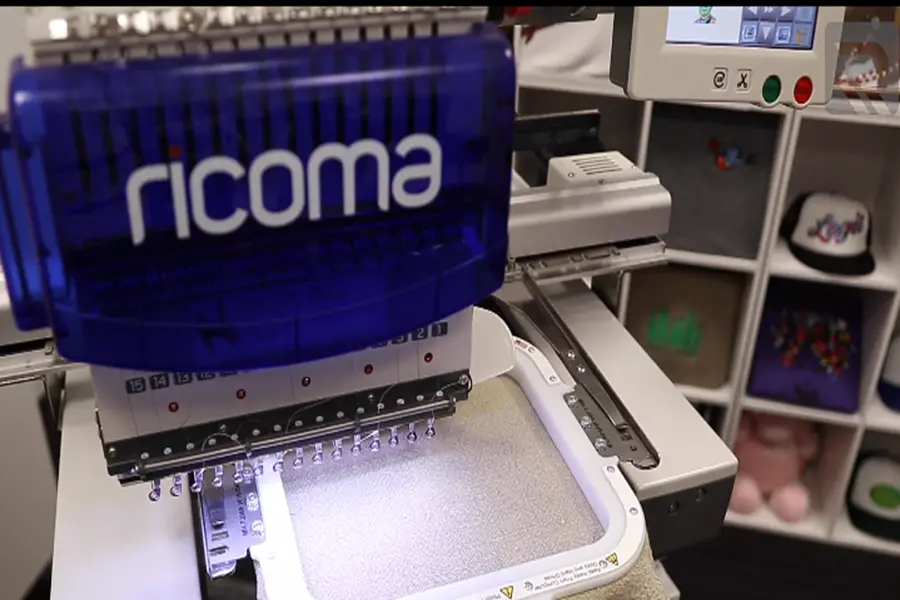
5- Take this prepared hoop into a backing arm of the machine that can run 1200 stitches per minute.
Make sure it is locked in. Add the stabilizer from the back of the machine under the garment while ensuring that the garment won’t overlap with the sewing arm of the machine. In that way, it also remains clear away from the needle.
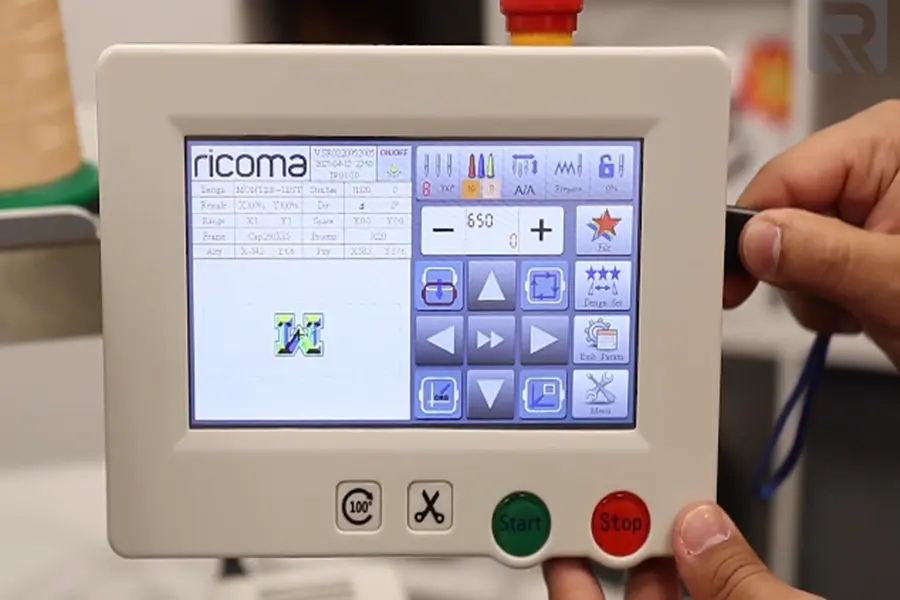
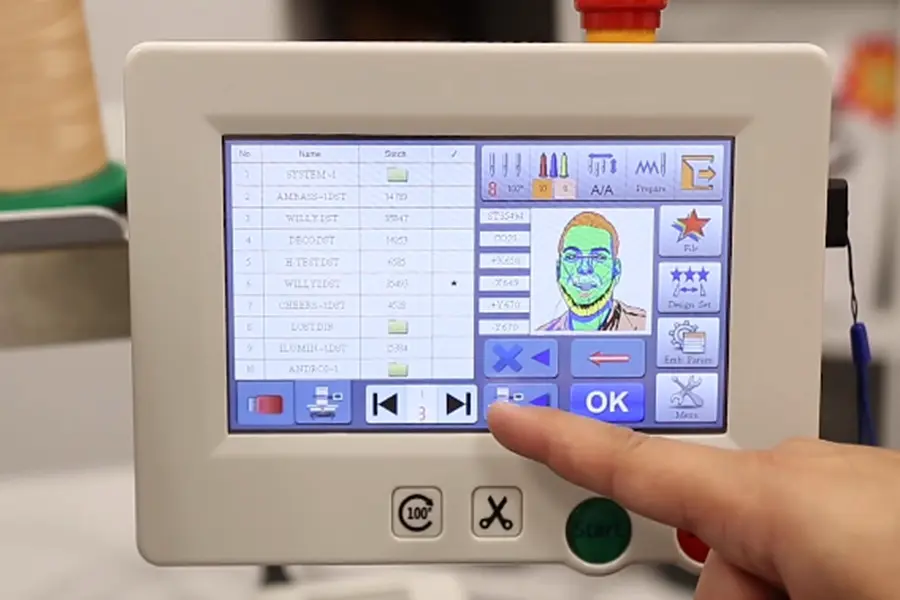
6- Insert the USB and transfer the design from the USB memory to the machine.
Click on the design file, and press the button to transfer. After that, reselect the design from the machine’s memory.
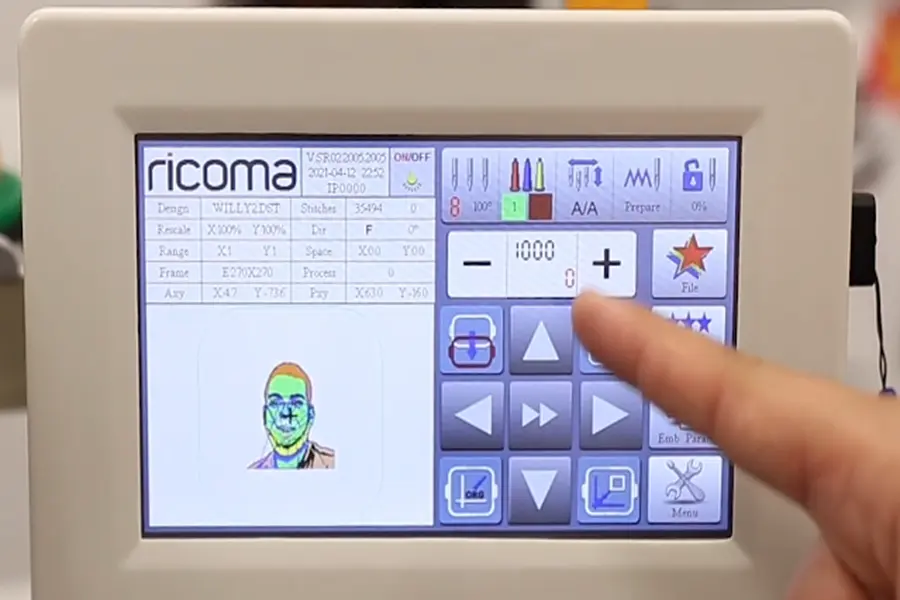
7- Select the hoop, choose a size, and proceed to color selection.
Now, bump up the speed to 1000 and lock the machine.
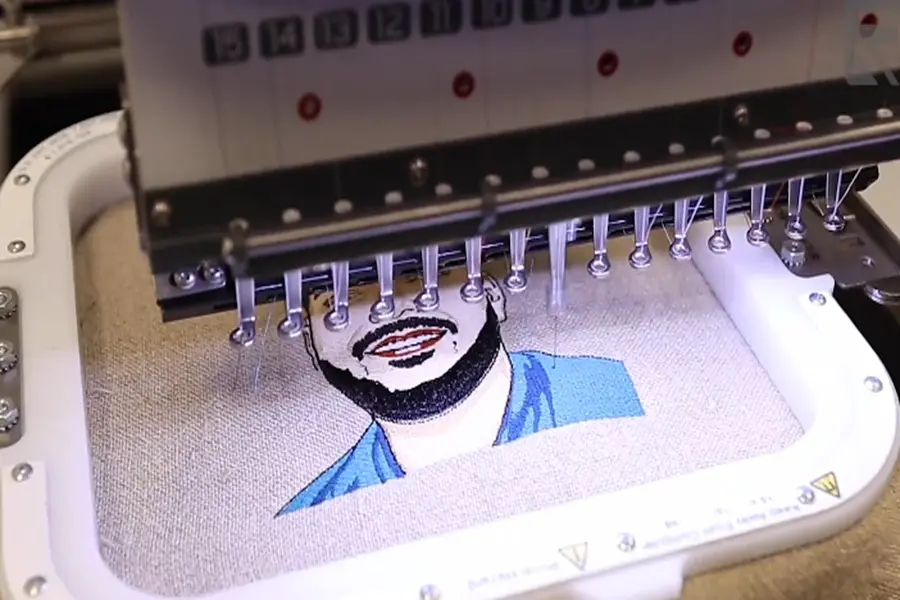
8- Begin tracing the design and press the start button for embroidery.
After that, put the pillow back inside smoothly and there you have a nicely embroidered pillow.
This is how you can easily convert a picture into a vector file for embroidery without any hassle.

EMdigitizer was phenomenal! Quick response time AND turnaround time! My conversion came out great!
Remarkable turnaround time and quality. I highly recommend going through EMdigitizer instead of trusting your printing company to digitize your logos.