If you are familiar with embroidery digitizing, then stitch density is a familiar term for you. It is necessary to learn about this feature and its importance for embroidery. So, we discuss which factors affect it and why it is responsible for enhancing the financing look. After reviewing this article, you can produce every type of design with full clarity.
Table of Contents
ToggleEmbroidery Digitizing Services
If you are looking for embroidery digitizing services, EMDigitizer is one of the best embroidery digitizing companies. Providing all types of embroidery digitizing Services. I recommend you try digitizing services.
Order NowGet Free QuoteOverview
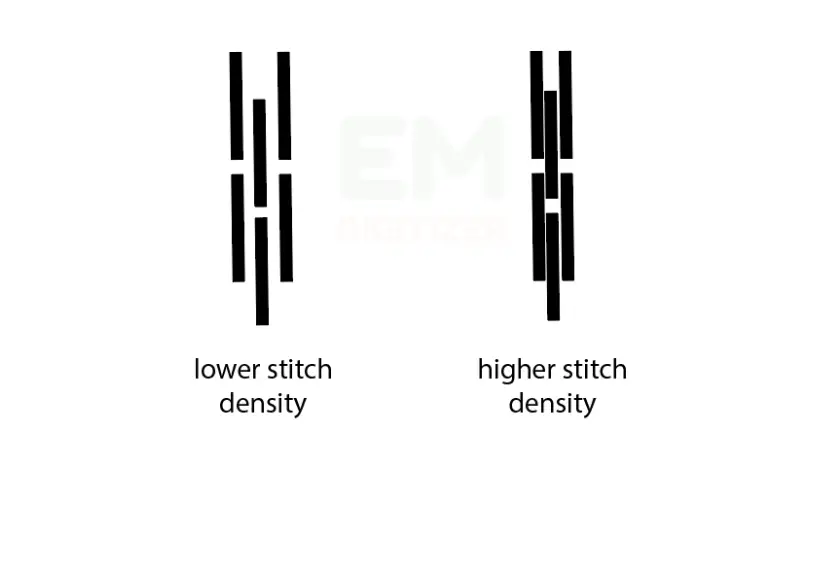
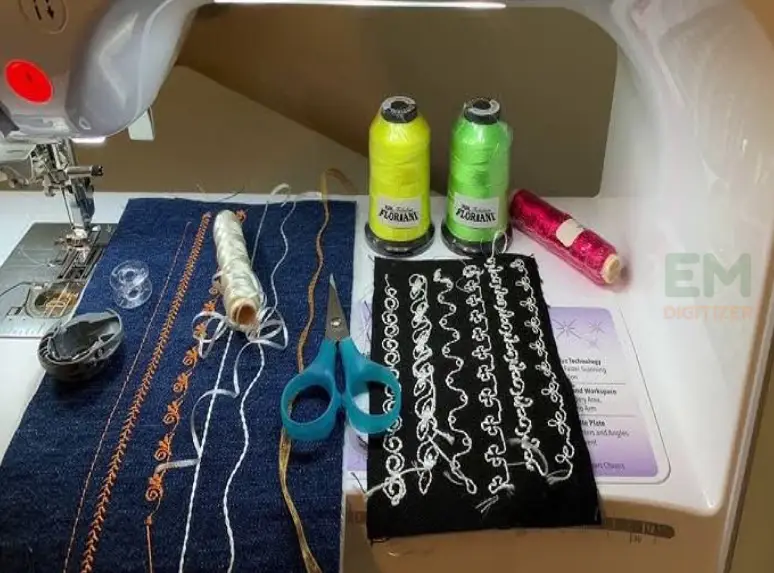
Stitch density is all about specific stitch quantity in every design section. It can be calculated in inches or millimeters. The other factor is how they are placed either too close or too far. This density varies for various patterns and stitch types. And there must be balance among these stitches.
This factor determines the quality and the stability of patterns on selected materials such as clothes and bags etc.
Selecting good density allows you to embroider designs without missing any detail and messing with threads.
It is also responsible for adding texture and neatness to the patterns after they are sewn out. So if you wish to make designs more durable, learn the basics of stitch density and tips to improve it.
Numerical Representation:
Many people are confused about the difference between higher stitch density and number. They think higher numbers refer to higher density. But this is another case. Higher numbers depict low density. It is different for every fabric type.
With increased density, you need to use more threads to cover your design. But in the case of higher numbers, threads are set far from each other to reduce the thickness.
Most people search about what would be the ideal stitch density for embroidery patterns.
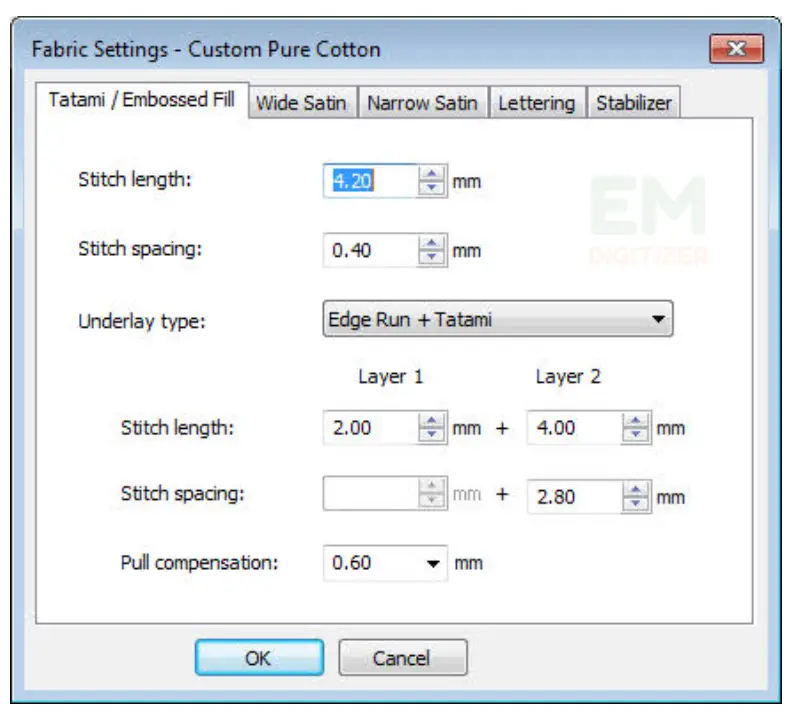
Let me explain it. There are different factors involved in digitizing. If you want to create a design on pure cotton cloth, the optimum stitch density must be 4.
It also depends on your good embroidery skills. For best results, try to perform a test to select a suitable density for your cloth and outline.
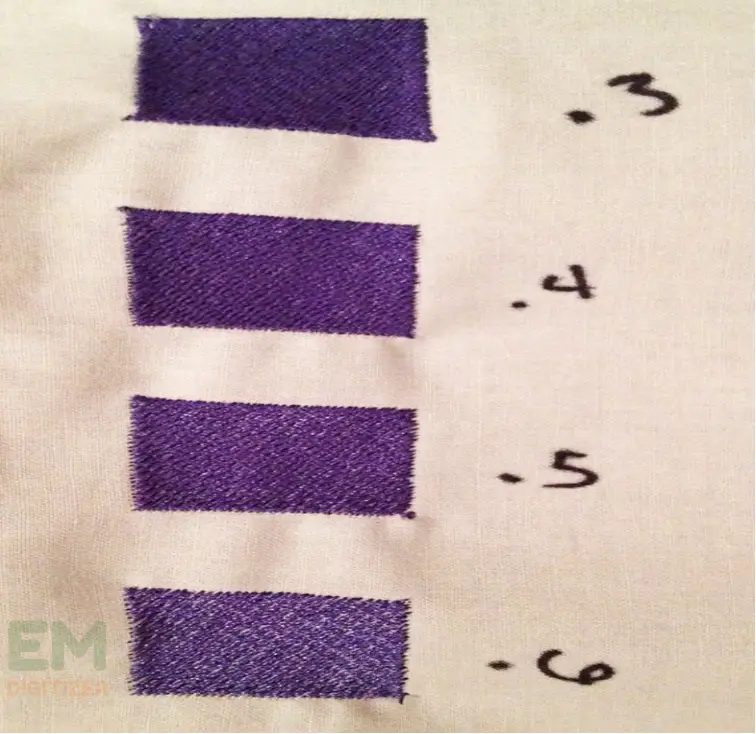
You can try experimenting with stitch densities from 3 to 6 on one design file. In this way, you can be sure of which is the best to go with and how changing them has various effects.
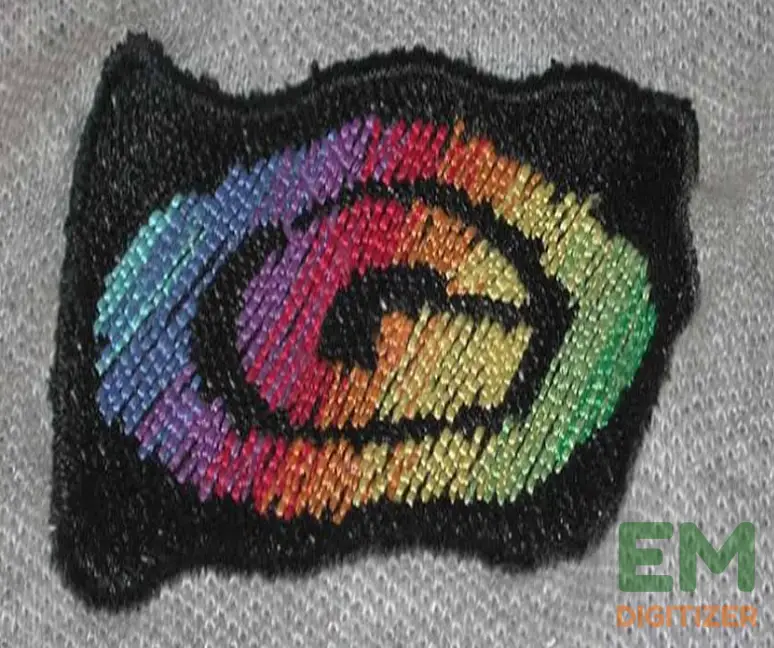
Now try creating a motif of 3 density, the threads would hide your garment. And when it is 6, you can see the garment and stitches. So going with 4 stitch density is the ideal choice. But for a 3D look, it would be a change.
Factors Depend On Stitch Density:
Nature of fabric:
If you are digitizing a design for soft garments, keep the density high. It provides the design with a better look. In case of heavy material, Keep it low. Be careful about the nature of the fabric and make sure to choose the suitable one.
Always keep balance while using stitches. For example, a satin stitch is used to make a floral pattern. The position of the stitches shouldn’t be too loose and dense. It is also advised to go with appropriate fabrics according to the nature of the design.
Type of Design:
Some designs require a higher number of stitches for better coverage such as lettering and more complex design. But with a design with fewer elements, try to keep it moderate to low. Skilled digitizers must decide the best setting according to design and it will turn out on your stuff.
Use of Thread:
It also decides what would be the ideal density for your desired pattern. Having good quality thread is all you need to make your designs stand out.
If you are using thick thread such as polyester and nylon, it requires more spacing to fill the design. But with lighter thread such as cotton, keep the density high.
Don’t confuse it with pull compensation:
The density tells us the gaps among stitches while pull compensation determines their width. The digitizing tools help to modify these two features according to pattern.
You can also do it manually after doing a small test. Although there is a slight difference among these, the factors are the same for getting the best outcome.
Tips to set the ideal stitch density:
Look at the following steps which help to improve embroidery.
- Make sure to calibrate the machine properly. It includes the needle, hoop, floss, and cloth selection. And most importantly a good digitizing software with digitizing skills.
- Try to maintain sufficient space, especially with complex design. You need to select eight stitch types and stitch volume to capture this detail. It keeps your complex details clear.
- For getting high-quality designs, try to choose underlay stitches and learn their use. It provides stability to all the stitches for better coverage.
- Other tips include learning the best stabilizer and backing to help prevent fabric puckering.
- A good connection with digitizers helps to clarify the details of projects.
- Being an embroiderer, you can also communicate to keep the right stitch density. This is to make sure you can easily embroider patterns in the machine.
Conclusion
Having proper Knowledge of stitch density is important. It also contributes to achieving the desired outcome of projects. Be active to keep it right that matches the fabric. Now it’s up to you to decide what setting goes best with your design but it depends on your skills.
Because wrong stitches result in a saggy design that won’t last for a long time. The poor-looking projects are not always due to poor densities but it could be due to the wrong placement of stitches, dull needles, and poor stabilization methods. So it’s better to know the embroidery elements first before regretting later for your invested time and efforts later.
The purpose of stitch density is to cover the fabric where we want to make our pattern. The higher one indicates holes among stitches.
As you go further, these holes lead to tearing and destroy the arrangement of stitches in the pattern. So try to keep it low, because unnecessary stitches are difficult to embroider on fabric medium.
A good design has good appeal due to the right thread tension, density, and cloth selection. If you are observing wrinkles in garments, it means you haven’t chosen the right densities of stitches.
The factor behind setting the wrong density might be the lack of proper digitizing skills and poor-quality tools.
But in some cases having good quality supplies fails to produce a clear design due to wrong density. It also results in missing stitches lack of detail and lack of uniformity in patterns.
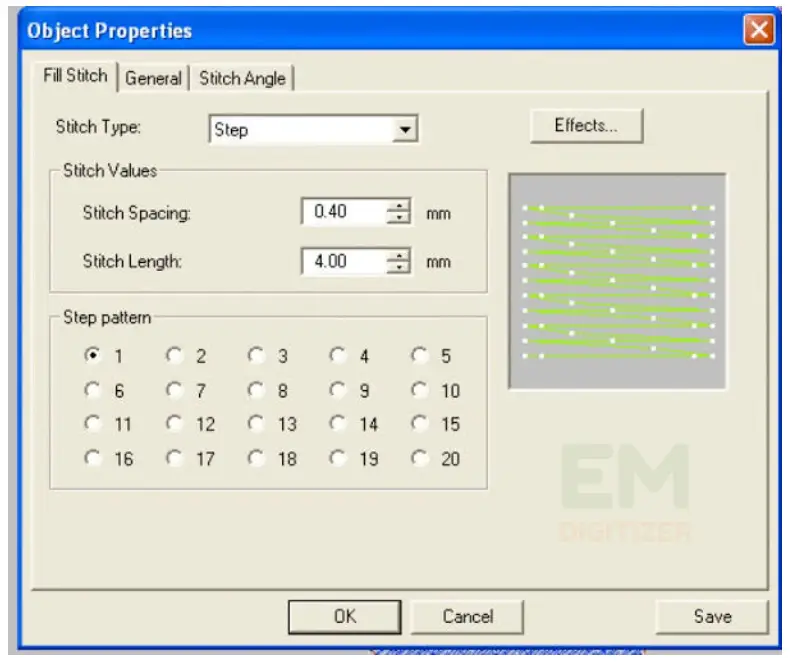
Step 01: For properly digitized design, try to invest in good software. It helps adjust proper stitch length and type from the drop-down menu. This setting could be different in different software. You can edit your patterns by adjusting stitch length with this software.
Step 02: You can also adjust this setting after exporting the design into the machine. You can simply scale up the pattern by increasing or decreasing the length of stitches across borders. If you compress it, it increases density automatically. For 3D and more textured patterns, consult digitizers to adjust your design accordingly.
If you have any questions leave the comments or you can visit our social channels for more updates regularly. We provide embroidery digitizing services if you need digitizing services feel free to contact us or email us.

