5 tips to choose the best embroidery fonts
Choosing the right font for your embroidery is very tricky yet important. Because the choice of font impacts the look and feel of your embroidery projects. In this blog, we will go through all the things you need to keep in mind when choosing the best embroidery fonts.
Table of Contents
Overview
A font is a digital representation of a single version of that typeface with one weight, width, and style. For example, a Helvetica new bold is a different font than a Helvetica new italic. Some people get confused between font and typography. Remember that typography is how you apply and place the font in context. For example, the caps showing the brand logo, placement, and spacing between letters or their arrangement are all under typography. Most people buy a font because it looks nice but one font does not fit all types of embroidery. So you have to be active and spend some time learning to choose the best font for embroidery.
In our previous blog, we explained embroidery fonts in detail and their types.
Tips for choosing best fonts

It is not easy to choose the right font from thousands of options available online. So the tip is, that you can shortlist your favorite or recommended fonts and then click on each to view the properties. For machine embroidery, we prefer buying block, sans serif, serif, and script fonts. But still, there are some other things to keep in mind when buying the right font for embroidery purposes. if you are beginner and you want to get knowledge about basics of embroidery machine. Then you can visit machine embroidery basics
1- Give attention to font detail such as size, and punctuation
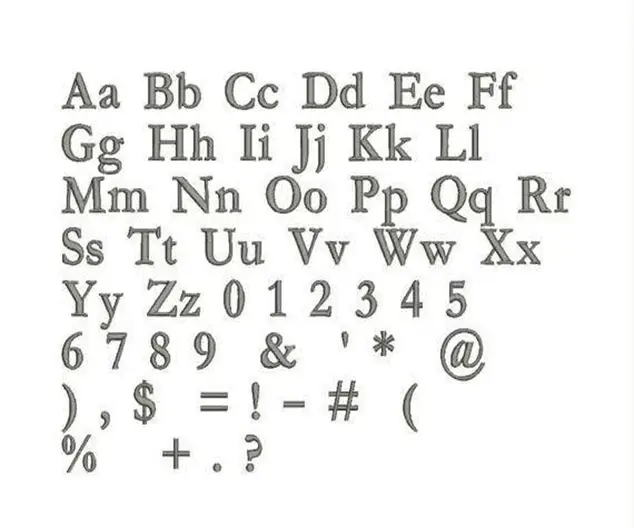
The first thing we want to look at is the size and how the letters look. When you go through the description for purchasing fonts, make sure that they also have uppercase letters, lowercase letters numbers, and punctuation. Sometimes, you have to buy numbers and symbols separately. Punctuation is one of those things that you forget about but if you want to embroider Miss or Mr, you’re going to need that little dot. If you want to do quotes, you’re going to need those quotation marks. When you visit a website for fonts, don’t just rely on pictures. Look at each letter individually, and buy a whole set of capital, small letters, and symbols as well. it’s important to pay attention to details because when you just buy a font and start typing words, it turns out tacky which doesn’t look good. If you want to get knowledge about How To Embroider on Paper Card, then you can visit: Embroider on Paper Card
2- Consider legibility in fonts
When selecting the font for the embroidered logo, make sure it is readable. If you are making a logo for promotional purposes, it must be easy to read for your audience at first glance. So there are two rules for selecting fonts for logos. First, make characters look thick with minimum negative space. And the second one is to choose the right form of font that you can resize and still, they are readable. if you want to desigin a logo by Adobe Illustrator. Then you can visit: Design A Brand Logo using Adobe Illustrator
3- Choose the font that is compatible with your software
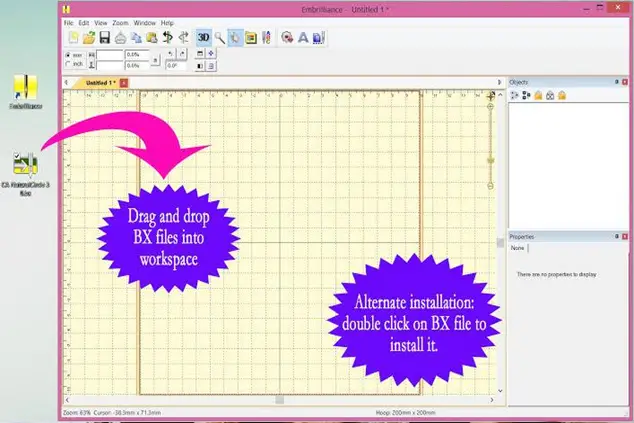
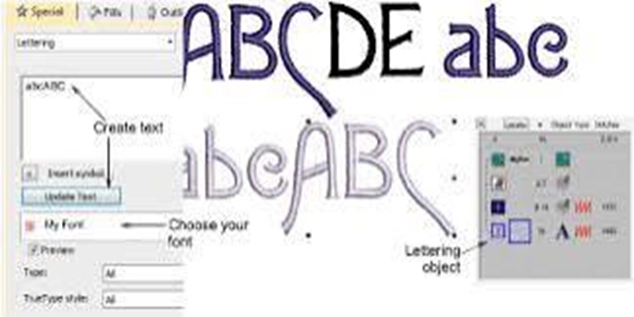
Instead of downloading software, I like to use the brilliance and it is completely free to edit my BX fonts. When you click on this drop-down, you’ll see all your different types of fonts so you do have to drag each individual size of font into brilliance. It will give you each size for each font in a row making it easy to navigate which one you want to use. After you select the font, you can turn the letters by simply clicking on the green dots to move each individual letter. Another cool feature is it’ll let you know if you are out of your hoop bounds indicating a red sign. So, you have to subtract letters until the red is gone. In this case, you can use two hoops to make a design or use a smaller font so that they can all be done in one hoop. But it’s also cool because the red will let you know how long your finished project is. So you can measure it out on your project from start to finish similar to embroidery files. If you are looking best software for embroidery. Then you can visit: Software For Embroidery
4- Save the font in the right format
Saving the font depends on what type of software you have and how you plan to use this font. There are two different file formats to choose from when you’re saving your work. The first one is the working file. And that’s going to save it in a BX format. This format is good for if you want to go back into your computer and re-edit it in brilliance. The only drawback with the bX file is your machine cannot read that file. So you’d also have to save it as a stitch file which is going to be in your specific machine format. So for me, it’s PES, your machine can obviously read it because it’s in the file format of your machine. But if you want to go back into it later to edit it, it’s not going to let you do that because it can’t read it back on the computer now. It is important to save all those fonts and digitized files in a folder carefully for later use because it is a matter of investment that you do to buy all those fonts and files.
5- Test the font
You also want to test your fonts before putting it on a finished product because it might look really nice in your editing software. And then when you get it on your scrap piece of material, it might be a total train wreck. To test the fonts, don’t pick a lot of colors to avoid wasting thread. And test the sizing like 5 millimetres or how the font looks at 10 millimetres etc. After that, you will be able to make the right choice of font for your project. For more about threads. Then you can visit: 5 Best Embroidery Thread Brands
How to choose the right font from the software?
Suppose you have plenty of fonts saved in Wilcom.
1- Categorize fonts
First of all, make a list of all the fonts you have in the embroidery digitizing software available. It will make it easy for you to match the fonts from your previous font folder. Then categorize the fonts into blocks, sans serif, or script. Now select the first five fonts from each category and take a printout of the sheet to show the customers and let them choose what they want. Doing this takes time but worth it. But the drawback is that, sometimes clients need unlimited font choices because not all of the font works for every application.
2- Consult to reference manual
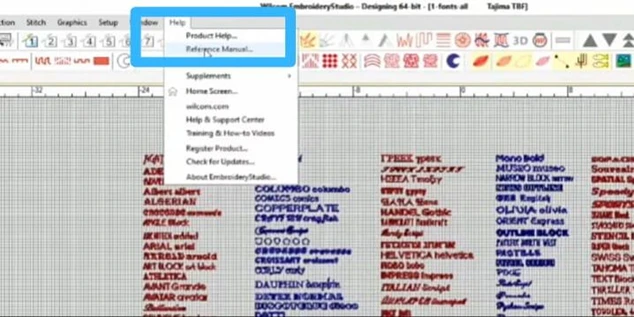
If you want to know how small or big your font will stitch out, simply click on” Help” and choose “Reference manual”.
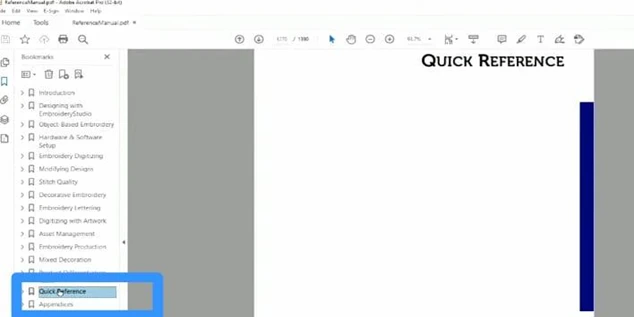
Then go to the quick reference, where you will find all the details of font categories such as block fonts or 3D puff fonts. According to this guide, for block fonts, do not go below 6 millimeters. And if you go above that, you have to learn the rules for small text embroidery.
Tip: If you are using script font, don’t put letters in capital form. It doesn’t look nice. And if you are using block fonts, putting all letters in capital reveals a good look.
If you want to get knowledge about Digitizing Letters, then you can visit: Digitizing Letters | 4 Important Things
Where to purchase embroidery fonts?
You can get your favorite fonts from websites such as Stitchtopia, Embroidery Designs, and Designs by JuJu. You can also buy them from Etsy. In another way, simply go to Google and write what you want, or explore Google fonts. You will definitely find a lot of font stuff there for every type of embroidery project.
Conclusion
Being an embroiderer, you must learn to choose the best font and different ways to use them effectively in your projects. You need to learn what font works with which embroidery stuff. Make sure to make a separate font file, give attention to details and legibility, and then save all the fonts in the right format. If you have a lot of fonts available in your software, categorize them, choose 5 from each category, and take a printout. It will help you to choose the right one matched to your project.
FAQs
A font is a digital representation of a single version of the typeface with the same weight, width, and style. At the same time, typography is how you apply and place the font (spacing between letters) over desired stuff.
Don’t just rely on the picture of the font you see online. Make sure to view each letter individually, and see whether they include numbers and symbols. The second thing to consider is the text legibility. Choose and save the font in a format that is editable in your software. Finally, make sure to test purchased fonts because you have paid for them and you want to get the desired result.
We have two files when working with fonts. The first one is the working file that needs to be saved in a BX format. This format is good for if you want to go back to your computer and re-edit it in brilliance. The only drawback with the bX file is your machine cannot read that file. So you’d also have to save it as a stitch file in PES format that most machines can read.
For machine embroidery, we prefer buying block, sans serif, serif, and script fonts. Block fonts are used in capital letters and script font letters are used in lowercase. Text fonts are also a category of custom fonts that you can download from Stitchtopia. You can simply edit, enter the name, and fix it anyway without having to recreate a name from scratch. It helps save time and fulfils large orders for those clients who want their names on t-shirts.
