7 Steps To Make Vector Image In Adobe Illustrator
Do you want to make editable and visually appealing vector images? For bringing your original ideas to life, Adobe Illustrator is the editor’s first choice. Let’s see how to create vector images in Adobe software as simply as possible. I’ll also provide a few tips on how to effectively create excellent graphics.
Table of Contents
Embroidery Digitizing Services
If you are looking for embroidery digitizing services, EMDigitizer is one of the best embroidery digitizing companies. Providing all types of embroidery digitizing Services. I recommend you try digitizing services.
Order NowGet Free QuoteOverview
When it comes to digital art, vector images are highly precise and flexible. Vector images are derived from algorithms, in contrast to raster images. It makes it possible to keep clarity on any level.
Vector graphics are therefore perfect for a variety of uses, including printed materials, web designs, and branding.
The power of vector artwork to be edited without losing quality is what makes them so beautiful. It guarantees that your designs will appear just as gorgeous on a single card just like on a big poster.
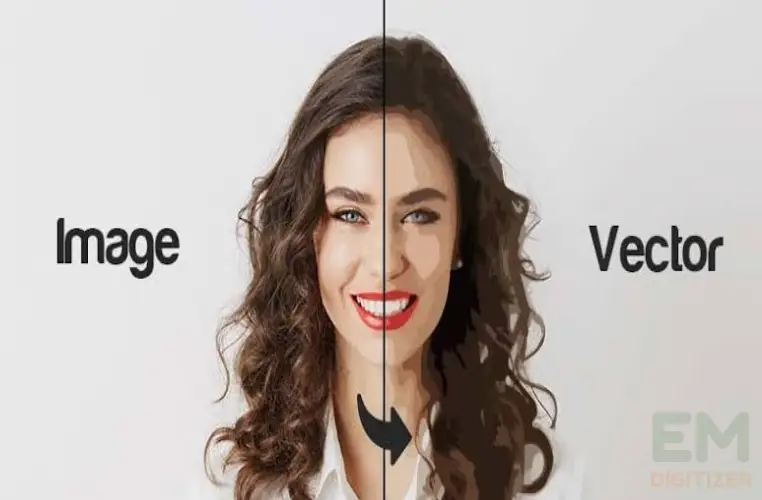
A wide range of tools are available in Adobe Illustrator to help you explore what you can create. With careful manipulation of direction, layer, and connection, one can easily create a vector image in Adobe.
You will have an unmatched influence on the creative process when you can make changes to every component of the design.
Artists have plenty of options when they become proficient in making vector images in Adobe. It enables them to carry out their thoughts with efficiency and grace.
7 Steps To Make Vector Image In Adobe:
Have you ever thought about how to transform your new ideas into elegant and flexible patterns? In Adobe Illustrator, let’s explore the exciting world of creating vector graphics!
Step 1: Upload Or Create New File
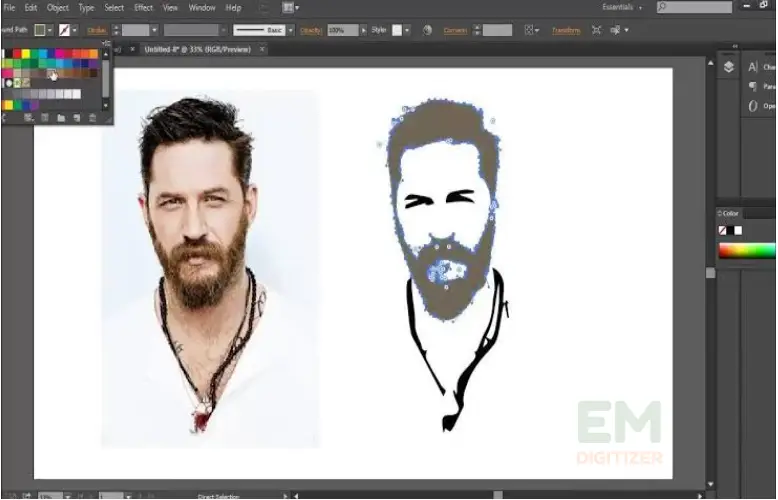
Choose the graphic that you wish to turn into a vector image in Adobe Illustrator. Consider the intricate pictures with distinct lines and curves ideal for vectorization procedures.
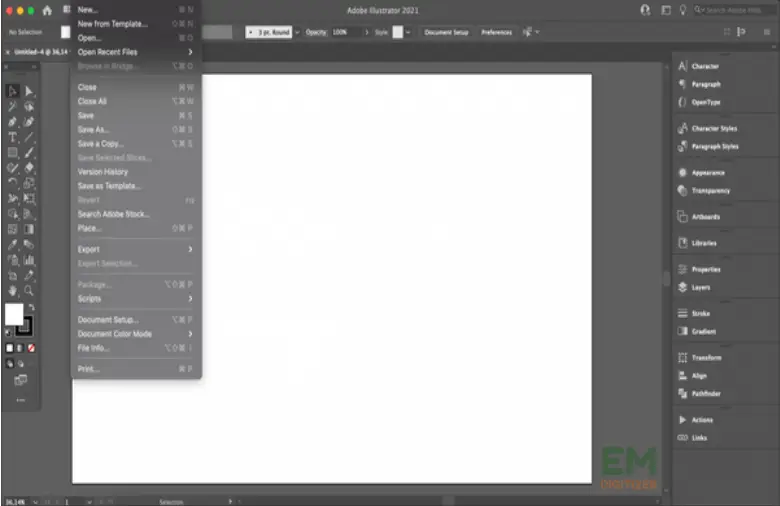
Now make a new file in Adobe. Think about the specifications for the project such as the size, color setting, and quality.
Step 2: Set Up Tracing Board
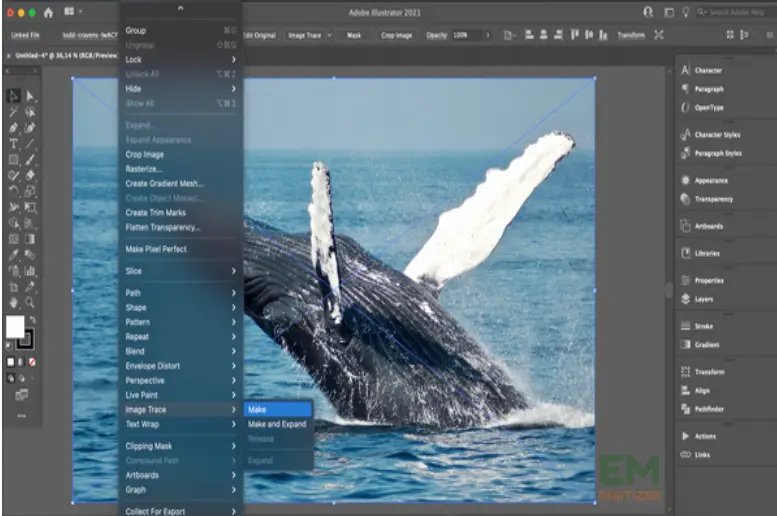
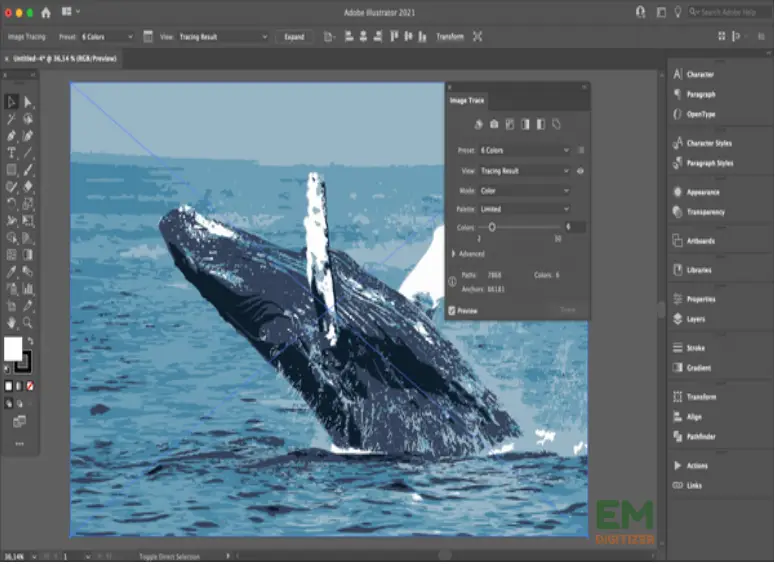
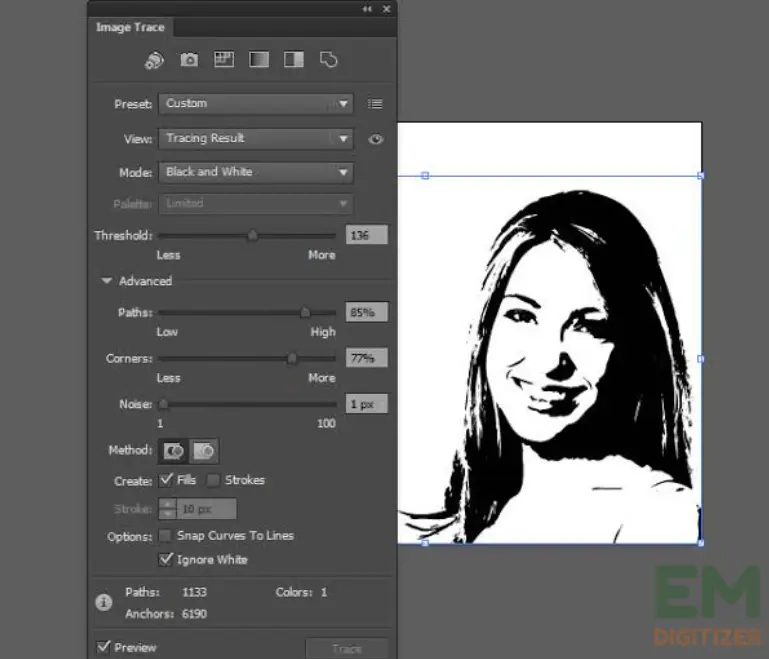
After importing the picture into Illustrator, select “Window” from the drop-down list for the “Image Trace” board. Select a default setting that matches the result you require.
Try out a few settings until you locate one that works best for the picture you have. To improve the tracing procedure, modify parameters such as baseline and directions.
Step 3: Begin Vectorizing The Image
To start the vector formation process, select the “Image Trace” option. Using the default you’ve selected, Illustrator will transform the image into the vector form. Be cautious, as the intricacy of the photo may require a bit of time to process.
4. Refine The Vector Image
After vectorizing the image, choose the tracked picture and return to the “Image Trace” board. Now click the “Expand” option to transform the picture to adjustable vector lines.
You can add more variations and improvements to your graphic in the following step.
Step 5: Set Up Colors
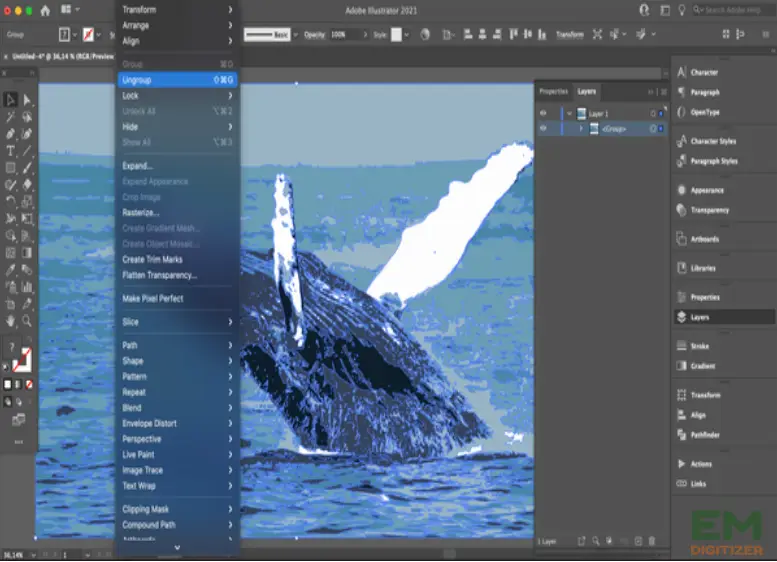
To control every color in the vector image, split the trace parts. For this purpose, just right-click and select “Ungroup.” You now have the flexibility to modify each color independently.
Step 6: Make Use Of Editing Tools
Optimize the picture after its vector paths have been dispersed. You can pick a path or dimension by using the “Direct Selection Tool”. Also try to utilize various tools, like the “Pen Tool” or “the Pathfinder,” to improve a vector image in Adobe.
If necessary, modify curved lines, and shades, or eliminate certain elements. You can try out different looks and tools to attain your particular taste.
Step 7: Save Your Vector Graphic
After being satisfied, the time has come to archive the vector image in Adobe. Click on “File” and select “Save As.” Choose a compatible file type, like SVG (Scalable Vector Graphics) or AI (Adobe Illustrator).
Make sure the graphics are sharp so that the design looks great on a variety of devices and in different resolutions.
You have successfully converted an ordinary picture into an eye-catching vector image in Adobe. Continue to hone the abilities you have for future projects.
Tips And Tricks To Make Vector Images in Adobe Illustrator:
- Use keys to swiftly get to commands and other necessary tools. It will increase the effectiveness of the illustrator operation.
- Producing accurate vector paths requires a full command of the Pen Tool. To improve your hands of curves, attempt to draw bends along with smooth lines.
- consider anchor points. To keep things simple, utilize a few and reposition the handles to create clean lines.
- In the case of lettering into vector graphics, put a great focus on font style. Ensure the font selections, border, and spacing match the rest of the layout.
- It’s simple to add, remove, and alter elements using the Pathfinder Control Tool. It is going to help make tricky vector art much easier.
- To make sure that components are evenly distributed and arranged use the distribution and alignment tools. This helps create a professional and formal impression.
- Learn gradient techniques to achieve seamless color changes. To add texture and depth, play around with straight and radial blends.
- Keep copies of the project regularly particularly when making significant changes. If you have to go back, it serves as the safest option.
Conclusion
Adobe has been my top choice to produce complex drawings to powerful slogans. Gaining proficiency in making vector images in Adobe reveals a creative world for you.
It makes the creation of beautiful designs easy with user-friendly tools and unmatched commands. It’s a flexible tool that lets you edit your images precisely.
Creating vector images in Adobe requires an organized method of setting up files. You will also need to move through learning the necessary tools.
Vector layout requires a basic knowledge of the following tools:
- The shaping Tools are useful for creating basic shapes
- The selection Tool is useful for shifting and converting items
- The pencil Tool is useful for illustrating directions.
Learning how to work with shortcut keys improves productivity and saves time with vector graphics. Additionally, look at Adobe’s functions, and take advantage of its Quick Guided tool.
For creating a new file, include details such as path, elements, as well as coloring. For effective design, prepare an illustration board based on its purpose in mind.
Layers provide organization and control over different elements in your design. It makes it easier to edit and manage complex vector artwork.
With powerful color management tools, you can improve any design by using basic colors, elevations, and textures.
If you have any questions leave the comments or you can visit our social channels for more updates regularly. We provide embroidery digitizing services if you need digitizing services feel free to contact us or email us.
