Complete Guides About Embroidery Placement On Shirts

Ever tried to put a square peg in a round hole? A 20-inch wide embroidered logo on one sleeve? (Hint hint, none of these work!) We all have a bag, bin, or large bin of shame. We find it easier to hide the shirts that didn’t work under the table and promise ourselves that we’ll “use the cloth for a test” instead of throwing them in the trash. These wears are usually present due to poor embroidery placement. He was slightly “off” or bent. Somehow asking a client or friend to stand shoulder to shoulder doesn’t sound like a great plan! Thankfully, this article is here to help make sure that never happens again!
Here is a complete guide on What Is The Softest T-Shirt Material
This blog will discuss the place of embroidery on shirts, and a wide range of tools and tricks to help you minimize the “hidden box of shame”. . You may come out with less testing fabric, but you will be more confident when embroidering. We’ll talk about anatomy, terminology, and how to get the best results. Let’s begin.
There is a complete guide on the Comfort Colors Shirts
If you are looking for embroidery digitizing services. EM Digitizer is one of the best embroidery digitizing companies. Providing all types of embroidery digitizing. I recommend you test digitizing services.
Order Logo DigitizingGet Free QuoteTable of Contents
Placement of Embroidered Designs
Embroidery Placement is important because it allows you to have consistent sewing results and a good-looking product. Sewing over a seam on a shirt isn’t so bad, but sewing over a seam on a jean jacket can break the needle or worse. The placement of the embroidery determines the wearability of the garment and how it looks. A 20-inch-wide logo won’t fit on the edge of a sleeve, but it’s also not suitable for the back of a shirt unless it’s oversized.
If you want to get knowledge about How To Design A Brand Logo using Adobe Illustrator, then you can visit: Brand Logo using Adobe Illustrator

Embroidery placement plan will allow you to work more successfully with clients and set yourself up for success. If you have a plan that you know you can stick to, it’s easier to talk yourself out of something you know won’t work. Will be. You can give the chart to a client or friend, show them the standard, and go from there.
Embroidery Placement also has a lot to do with hoops. Trying to fit a 130mm hoop into a shirt pocket won’t work (unless you like removing pockets, and that’s not a lot of fun!) Since you already know the size of your hoops, this gives you It will help to use designs that stay within these limits. If you want to get knowledge about how to embroider on clothes, then you can visit: embroider on clothes
How To Determine The Embroidery Placement Measurement
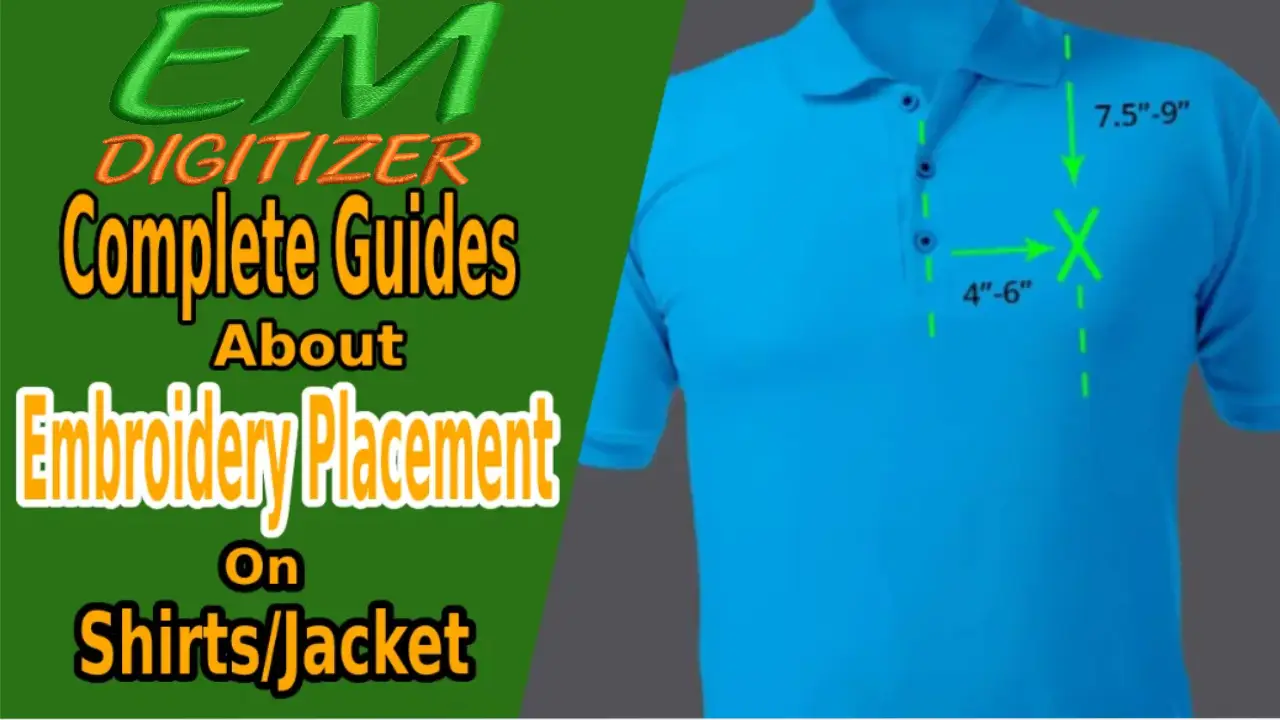
To determine exactly where you should place the design, measure the width of the item, usually from one side seam to the other side seam on the fabric or, if there is a placket, from the placket to the side seam. up to. Divide this measurement by two. Mark this measurement as a short vertical line. Mark the distance from the top seam/edge. Mark it as a horizontal line. The center point of these two lines will form the center of your embroidery design space unless otherwise noted.
If you want to get knowledge about Digitizing Logos for Corporate Branding, then you can visit: Digitizing Logos for Corporate Branding
Tools for Perfect Embroidery Placement
Just you can decide what works for you and will make you comfortable so whatever you choose, be consistent and give it a chance to work.
| Tool | Description |
| Placement Chart | Available online and printable. Useful for client intake and design agreement. |
| T-shirt and Placement Rulers | Look like a cross or T-square. Help mark shirt placements accurately. |
| Plain ole’ Tape Measure | Reliable and consistent if used with the same reference points. |
| Hooping Systems | Hold hoops in place, save time and strain. Great for repeated garment hooping and alignment. |
In Detail
- Placement Chart: They are available online and in printable form. These also work best as client intake forms so that both you and the client agree.
- T-shirt and placement rollers: These look like a cross or T-square, some have cut-outs for the neck of the shirt and are designed to be used on a shirt that is laid flat. You can use a tailor’s chalk or a washable marker to carefully mark the placement lines of your design.
- Plain ole’ tape measure: A tape measure is all that’s needed as long as you’re consistent with the measuring points. Again, you are the best judge of what works for you!
- Hopping Systems: These are becoming very popular and for a reason. They work! Hooping stations are meant to hold a magnetic or regular hoop while you slide the garment on and then set your hoop in place. They are usually shaped like a t-shirt outline with an extension where your neck would be. A hooping station is just that – it will be the heart of your garment embroidery work and although they may seem expensive in the end they save your wrists, your money, and your sanity!
Embroidery Placement On Shirt And Jackets
Jackets are generally the same as shirts, but the type of jacket can limit you. The yokes will change the placement and size, and other features such as studs, jewelry, and interior, and exterior pockets will make the decisions for you.
Terms of shirts and jackets
| Garment Type | Notes |
| T-shirts | Fold shoulder seams together to find true center. Ignore shirt creases; measure accurately. |
| Collar, Polo, Dress Shirts | Measure from placket center; keep buttons open for proper shape. |
| Jackets | Consider seam allowance, pockets, and yoke variations when placing designs. |
In Detail
- T-shirts: These will be the most common garment that you embroider on. There is a neckline, which is high from the front to the back on most shirts. They come as round necks, (most common) boat necks (the opening is wide and not deep—resembling a boat), and V necks. The collar is almost always folded over a ribbed knit band. (Your marks on it are front center) Fold the shirt in half, holding the shoulder seams together. Mark the center with a pin. Just because your new t-shirt has a crease in the middle doesn’t mean it’s the center point! Be sure to measure for yourself.
- Collar, polo, and dress shirts: The main difference between a t-shirt and a collar or polo is the V-neck placket where the buttons and buttonholes are. From the center point of the placket, the center of the shirt is measured (Note: Make sure to leave these buttons open as this will help the shirt retain its shape)
- Jackets: Jackets are just big, heavy shirts with long sleeves, but they can have a few more obstacles! The yoke is the topmost part across the shoulders, and there may be right and left yokes in front. Remember that even though you can embroider here, be sure to consider the width of the seam allowance on the inside. Use your fingers to nip and see where the edge of the fabric is.
Right sizes and measurements for shirts and jackets
| Placement Area | Recommended Size | Notes |
| Left/Right Chest | 3-4″ wide, 2-3″ high | Adjust for shirt size. Use paper cutouts to preview actual dimensions. |
| Shirt Back (Full Back) | 11-12″ wide, up to 14″ tall | Varies by shirt size. Stay balanced and not overly large. |
In Detail
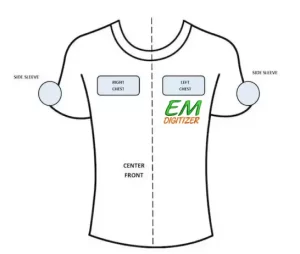
Typically, shirt logos are placed on the left chest (above your heart), but they are often seen on the right chest. The correct size is about 3-4 inches (or a little more for larger shirts) and 2-3 inches high. Sure, you can make them any size you like, but before you hit the start button, make a paper cutout and place it on the shirt to see how big it really is! Many times we see images on the screen that just look so big that they are dwarfed by the shirt (by the way, it works the other way around too – it prevents you from going too big).
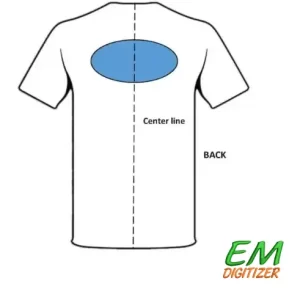
The shirt back (full back) seam is usually 11-12 inches wide and as long as your shirt will allow but remember that less is more and stay around 12-14 inches long. Short, long, large, and short shirts will vary.
To place the shirt front embroidery correctly, it should be horizontally at a point between the center line and the sleeve seam and vertically between the shoulder seam and the bottom of the sleeve. For the back, it should be placed on the centerline between the shoulder blades, and at the center point between the collar seam and the seam under your arm. These may vary, but this is a good starting point.
Tips For Perfect Embroidery Placement
Watch out for hazards
You may not realize it, but there are many hidden dangers lurking in your embroidery piece. Always feel the material and look for zippers, buttons, Velcro, seams, or heavy associating. This is especially important during bag embroidery. Attempting to embroider on them can cause the needle to break and damage your machine.
Measure twice, sew once!
We must emphasize the importance of careful measurement before pressing the start button. If needed, a small checklist on hand at your workstation will help you make sure you’ve covered the bases! You can use chalk markers, invisible pens, pins, or whatever method works best for you. Sometimes it is helpful to step away for a moment and then come back and check your machine before starting it.
Know your stabilizer.
It is important to mention that when embroidering clothes you need the right stabilizer. If you are using a stabilizer with your skin, always use a no-show mesh or cutaway stabilizer as they will soften over time. A layer of wash on top, botto
m, and top of your towels work wonders.
How to determine bad placement
The bad news is that once the embroidery is complete, it’s hard to pinpoint a bad spot. good news? Even if you start the machine, there are some ways to save your clothes.
| Mistake Type | Recovery Method |
| Remove Stitches | Carefully work from the back of the garment |
| Over Slicing | Stop immediately; reposition and reattach if not too dense |
| Be Creative | Consider applique, patches, or other ways to salvage the item |
Conclusion
We’ve covered the terms jackets, shirts, and hats in a variety of places, but for an easy takeaway, here are the key points to remember:
- Measure twice, sew once and use the best measuring method that works for you.
- Take your time, and walk away if necessary.
- Use some of the available measuring aids, such as placement charts, rulers, and hooping systems.
- Always check for hidden threats. And the last thing is to damage your machine.
With practice, you’ll soon find the right placement on your garment, ensuring a happy customer, machine, and yourself!
Where do you position embroidery?
Generally, the top of the design should be 3 1/2 – 4 1/2 inches from the neckline of the garment, centered between the left and right seams. 5″ back from the shirt collar, centered between right and left seams. Jacket backs 7″ – 9″ below the shoulder seam, centered between side seams.
Which side do you embroider on?
If you are embroidering only one side, the name and/or logo should go to the left chest position. If you are putting the person’s name and logo on both sides, the name should go to the right and the logo should go to the left.
Why are my embroidery designs not aligning?
This mainly happens when the fabric is not set correctly on the embroidery frame or the upper thread is too tight. The wrong backing material (stabilizer) is applied to the fabric. A thicker stabilizer may be used for stretchy or thin fabrics.
Why are there gaps in my embroidery?
The layers of fabric and stabilizer shift, and you’ll see gaps in the stitching. Second, hooping. Not hooping, or not hooping tightly enough, can lead to gapping. I mentioned earlier how stitches add weight to a piece of fabric, and how a stabilizer helps support the fabric.
Does the Monogram go right or left?
Left
Monograms are mostly placed on the left front of shirts and jackets. You can also apply a monogram on the shirt cuff, collar, and left arm. Some jackets have them on the lining.
If you have any questions leave the comments or you can visit our social channels for more updates regularly. We provide embroidery digitizing services if you need digitizing services feel free to contact us or email us.

