How to Create 3D Machine Embroidery Leaves – Complete Tutorial
Do you adore the 3D look of embroidery for creating seasonal and themed garments? Especially during the autumn season. People want to enjoy the holiday season with more personal and themed decorations for their homes and clothing.
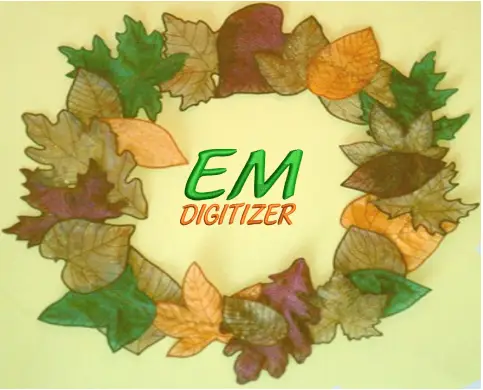
For fall lovers, embroidering an art as embroidery leaf is a greater source of pleasure. And this post contains key tips to assist you in creating something festive such as 3D embroidery leaves for home decor that you can use however you like.
If you are looking for embroidery digitizing services, EMDigitizer is one of the best embroidery digitizing companies. Providing all types of embroidery digitizing Services. I recommend you try digitizing services.
Order NowGet Free QuoteOverview
Seasonal people overs may go around to get their goods to decorate their walls and other home essentials to add a seasonal touch to their Items. There is nothing more amusing than embroidering leaves of multiple colors similar to the fall scenery. One can use them as a free-standing wall hanging or to decorate your table and other purposes. As I am going to make 3D embroidery leaves, it can be difficult for those who never made any practice before this.
But you don’t need to worry about it. Just going through this article helps you to embroider the leaves. With a little practice, you will enjoy the process of creating embroidery leaves with full relaxation. Leaves are available in different shapes and sizes in stores and you can make them more fascinating with the embroidery machine by taking into account the use of colorful floss and fabric according to the projects. Such as bedding, tablet cover, pillow case(here is the complete tutorial of how to embroider a pillowcase), free-standing embroidery leaves hanging, and other decorations.
Benefit Of Creating 3D Embroidery Leaves
As you know the fall season is there.
People simultaneously rush towards the stores to get something more exclusive for home decor to enjoy this festive season.
But when they reached the store, they came back disappointed due to the price tags. Because the storekeepers know that the demand for themed seasonal fabrics gets increasing and they increase the price tags too. People have to pay for them and it will disturb their pockets.
If you want to know that how to create 3d puff embroidery, click here.
What makes this process easy for you is just getting all the supplies that will never burden your budget and machine. With a few steps, you can create unique embroidery leaves and it would be a great addition for decorative purposes.
Essential Supplies
- Embroidery machine and hoop
- Organza fabric(You can use other stuff depending upon the design and project)
- Water soluble backing as wash away
- Pre-wound bobbin(It should be matched with the bottom fabric)
- Solder Iron
- Optional hair dryer
- Specific embroidery design for leaves
- Spray bottle
Key Tips To Create 3D Embroidery Leaves In Fall
I’m going to demonstrate how to create 3D-looking embroidery leaves for you guys to utilize in any way you see fit to add a festive touch.
Step 01- Put The Fabric’s Backing In Place
The fabric you’ve chosen for the embroidered leaves as organza needs to be placed flat in the first step. Now place a portion of the backing material that is water soluble, such as wash away, on the top side of that fabric. Following that, add another fabric to the top of the backing.
Note: Use light-colored fabric on the back of the backing material and dark-colored cloth on the upper side for a colourful appearance.
Step 02- Hoop The Fabric
Now hoop together all these fabric pieces into the embroidery machine.
(Visit this link to know about how to use magnetic embroidery hoops).
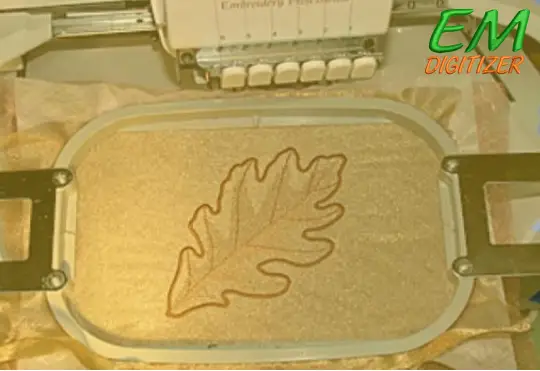
Step 03- Start Embroidery
After you have put all of the fabric into the hoop, start embroidering the leaves on the embroidery machine. Once you have finished, take the embroidery leaves out of the machine.
Step 04- Add More Festive Touch To The Embroidery Leaves
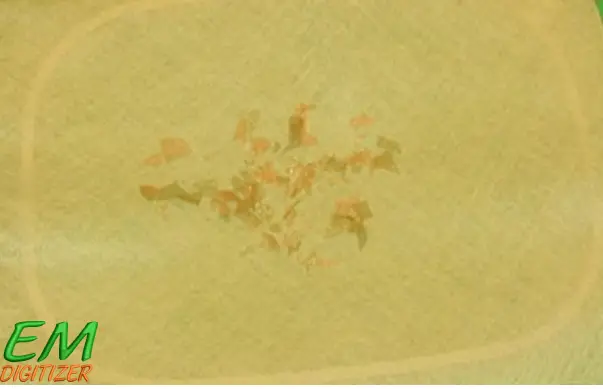
It all depends upon you on how you can Add more creativity to the project of embroidery leaves to make it perfect for the autumn touch. Simply cut another piece of organza fabric into bits. But it should be of multiple colors other than the fabric used on the upper and lower side of the backing.
For this purpose
Take a piece of organza fabric and again put a piece of wash away backing on its top. After that put all the bites of organza on this backing material where you want your embroidery design. Repeat the second step here and add another piece of fabric and hoop them together carefully.
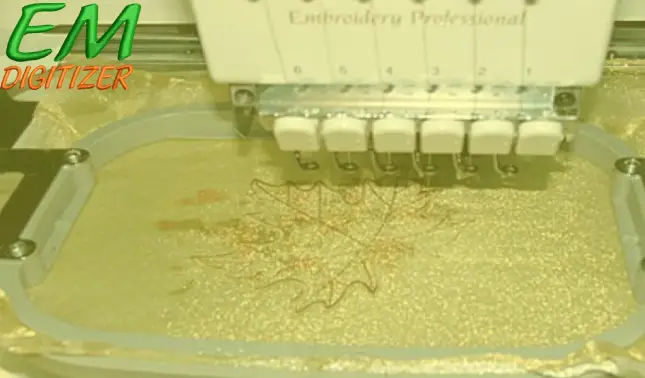
Step 05- Start Embroidery
Again after proper hooping of the fabric pieces, start the machine for making these festive embroidery leaves.
Step 06- Fine Cutting Of Embroidery Leaves
After stitching the embroidery leaves, detach them from the hoop and give them a fine cut close to the border. Make sure not to cut the embroidery design in hurry.
Step 07–Trace The Outline Of Embroidery Leaves
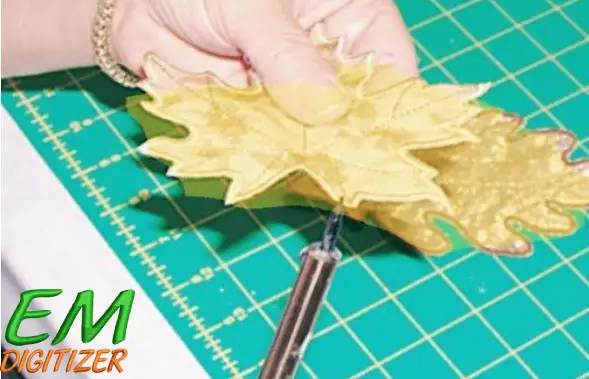
Now your next step is to draw a proper outline of these closely cut embroidery leaves from the border. You can simply use solder iron to mark the edges but keep in mind to avoid cutting the embroidery design.
Step 08- Washout The Embroidery Leaves
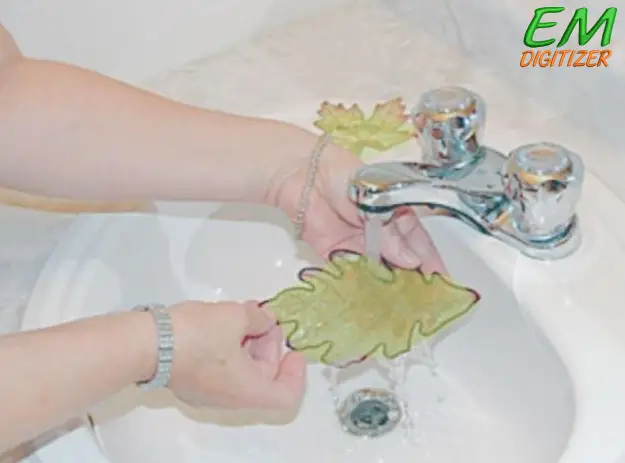
Take the embroidery leaves under the lukewarm tap water. The purpose of this step is to dissolve the wash-away backing.
Step 09- Let The Leaves Dry
Place the embroidery leaves flat on a dry surface and leave them to dry. You can also take advantage of blow dryers for drying purposes.
Step 10- Set A Proper Shape
An unusual phenomenon occurs with embroidery leaves when they are completely dry. As we are looking for a 3D effect with embroidery leaves, the stitches shouldn’t be flat. To deal with this blunder, you can spray water bottles and sprinkle little drops of water on these embroidery leaves. It will help you to shape the embroidery leaves in a desired pattern.
Final Note
Now your embroidery leaves are ready to be used for decoration and any other way you decide to celebrate the fall season enthusiastically.
Conclusion
That’s it for making festive embroidery leaves so you can use it for home decor and as a pattern to expand your embroidery business. The reason is that most people tend to choose themed fabrics and home accessories for some occasions to enjoy the joys of that particular season.
So you don’t have to worry about the budget. I have made this process easier for you. Have all your supplies ready and start the process in your spare time. By following our tips, you’ll have these amazing embroidery leaves in no time. Get blockbuster results at a low cost. Let’s have fun in autumn together!
The Key steps are:
- Put the fabric’s backing in place
- Hoop the fabric
- Stitching the design
- Cutting of embroidery leaves
- Trace the outline from the edges of the leaves
- Washout the embroidery leaves
- Let the leaves dry
- Give leaves a specific shape
The use of Water soluble (e.g, wash away or dissolved away) backing material is recommended to create 3D embroidery leaves for home decor and other projects. Because these can be dissolved easily with water to give embroidery leaves a fresh look.
Cut the multi-colored organza into small pieces and put all these pieces on the backing material where you want to embroider the design. Then add another piece of organza fabric onto this backing material. Hoop them together and start embroidering leaves.
When you will embroider the leaves, place them under tap water to dissolve the backing. After the leaves get dried you may notice the flattening of your embroidery leaves. To deal with this issue, use spray bottles and moisten the embroidery leaves with drops of water. It will raise your embroidery design and help to retain the shape you want.
If you have any questions leave the comments or you can visit our social channels for more updates regularly. We provide embroidery digitizing services if you need digitizing services feel free to contact us or email us.
