What Are Underlay Stitches For Embroidery & Digitizing? Explanation
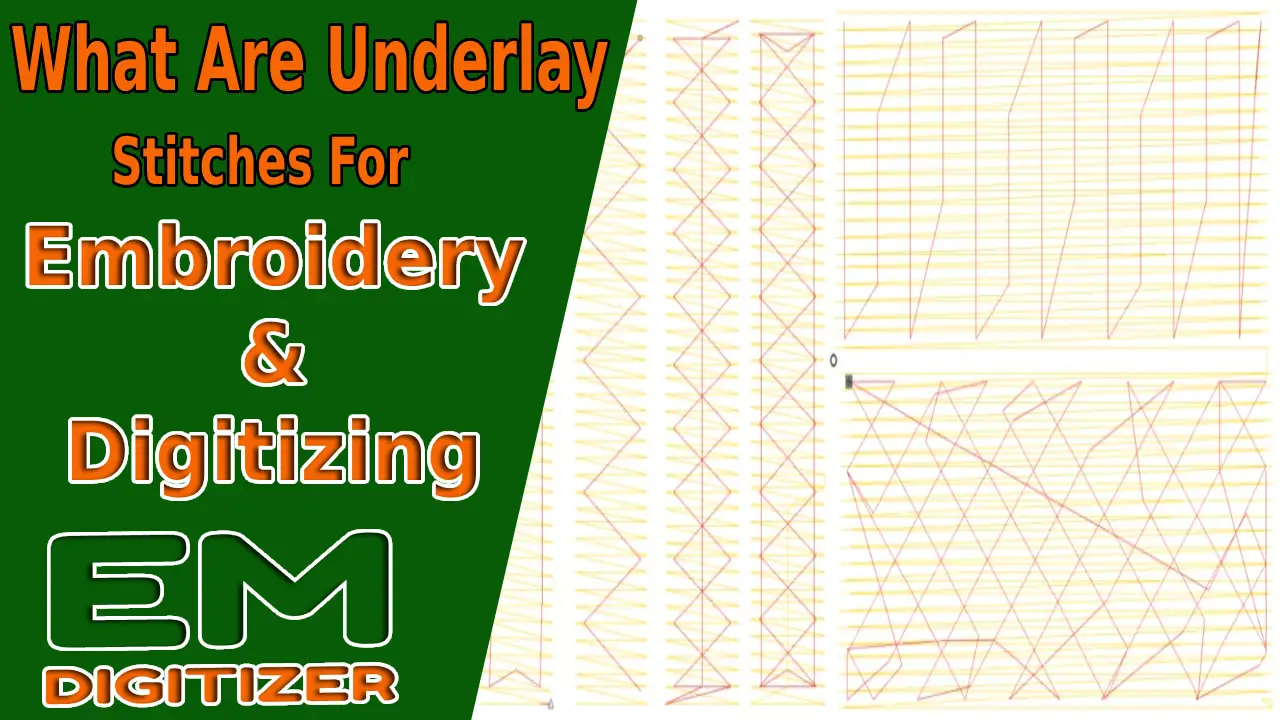
To begin with, you must understand what underlay is to comprehend the underlay stitches for embroidery and digitizing. Thus, the underlay essentially serves as a base for digitized embroidery designs.
I’ll go over the various embroidery and digitizing underlay stitch types and when we can use them while keeping in mind their intended use.
If you are looking for embroidery digitizing services, EMDigitizer is one of the best embroidery digitizing companies. Providing all types of embroidery digitizing Services. I recommend you try digitizing services.
Order NowGet Free QuoteOverview
Before placing stitches, the underlay functions as a basic point to help maintain all of the embroidery design’s components. Stabilizers and fabric will shift somewhat as you hoop them.
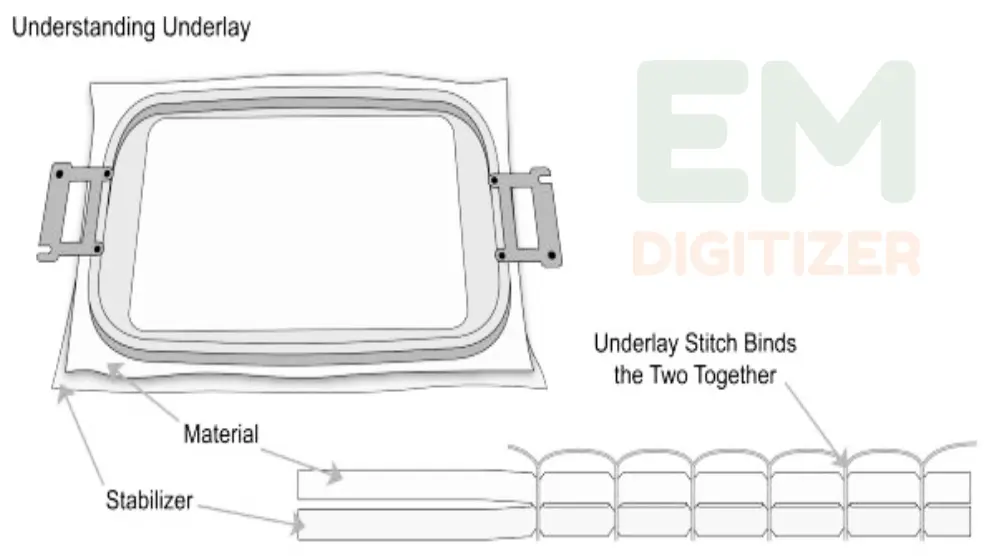
Underlay will perform its function in this situation and work to reduce displacement to prevent such movement or retain them in place. I’ll thus talk about underlay type digitizing and stitching in this blog article.
You need to be aware of the various embroidery stitches and what goes on somewhere inside the needle because you are new to this process. Let’s begin by comprehending the underlay stitches for embroidery and digitizing, as well as how to use them.
Underlay Stitches for Embroidery and Digitizing
Running threads, which we apply in various locations and various directions, are technically known as underlay stitches. In contrast to satin stitches and fall stitches, these embroidery stitches are shorter and provide a dense base for the design.
Using underlay stitches for embroidery also lessens the possibility of crinkles when the stitching is finished and removed from the hoop.
Along with top stitches, using underlay stitches for embroidery improves the appearance of your digitized design.
Additionally, by reducing thickness, underlay stitches for embroidery keep your embroidery design looking nice and let you add additional layers of stitching on top of the previous ones.
How Will Underlay Stitches for Embroidery work?
It’s crucial to understand the operation of underlay stitches for embroidery and digitizing and how to place them. Let’s talk about using illustrations.
Example 01
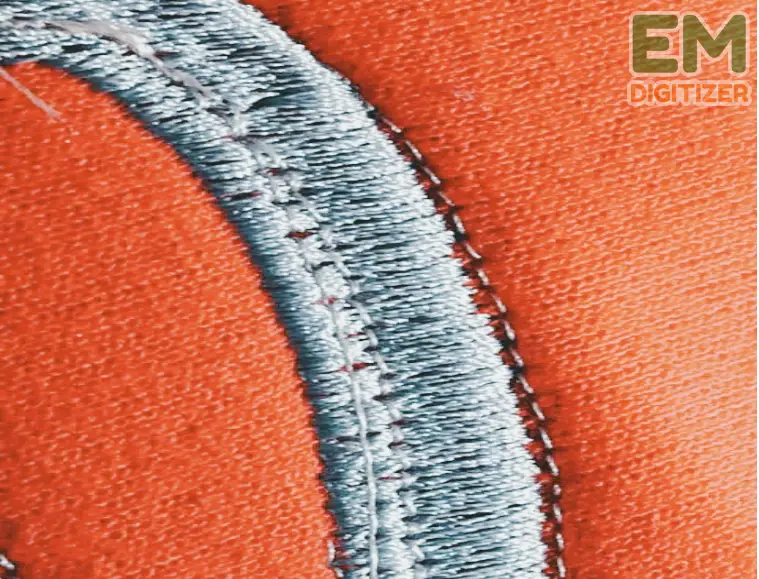
I’m going to use a running stitch before passing out the underlays from the middle of the project. After being stitched out, these applied stitches for embroidery now start to look wedge-shaped. Hence lose its neat and orderly look.
Now, you can’t put the responsibility for this on your embroidery machine. It occurs as a result of your failure to position the underlay properly.
Example 02
The identical object as before is now present, but the underlay stitches are now placed more closely to the edge.
You’ll get sucked back into the issue if you do that.
To remove all these extraneous threads from the pattern, an underlay stitch that is put close to the edge peeks out far outside the satin stitch.
Example 03
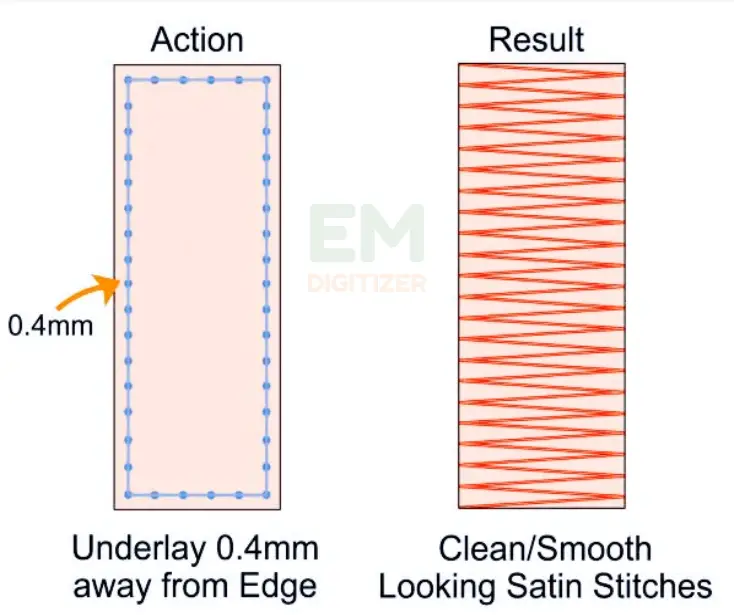
When you run this material far below the embroidery machine, you will observe how the placement of stitches for embroidery exposes a perfectly clean finish after positioning the underlay stitch 0.4mm beyond the edge of the object inwardly.
It is because the underlay is now acting as a barrier against this object and prevents the leading thread from continuing its pull toward the object’s center.
When working with sparsely woven garments, one can apply this kind of stitch for embroidery.
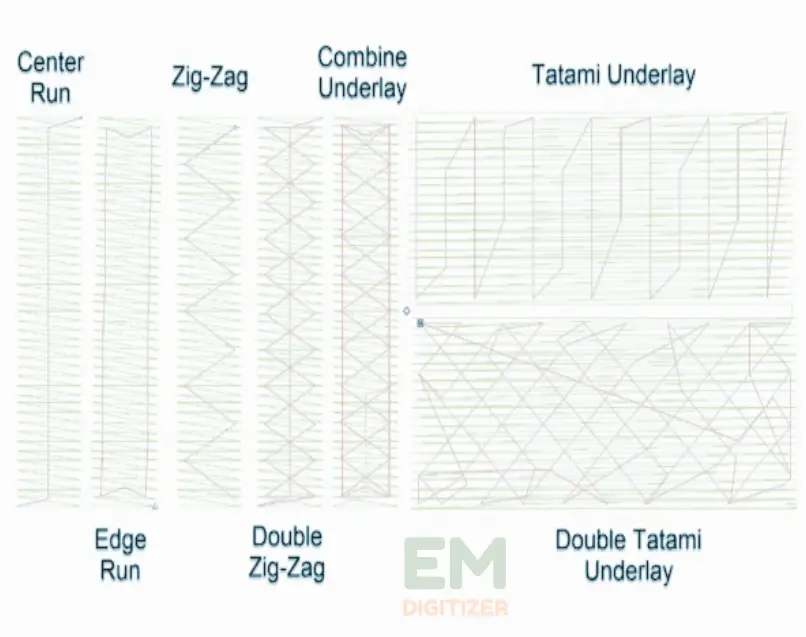
Focus On the Type of Underlay Stitches for Embroidery and Digitizing
It’s crucial to understand the different kinds of underlay stitches for embroidery digitizing and how to use them. Because the finished product of your stitched embroidery design must be remarkably effective.
1-Center Run Underlay
These stitches for embroidery, as their name implies, are used on tiny columns of satin threads in the precise range of 1.5 to 2 millimeters.
Since there isn’t enough room for them to pass, these embroidery stitches run straight from the center of objects.
2- Edge Run Underlay
Edge run underlay will be used at a distance of 2.5-3.5mm after your satin stitch column becomes broader and develops a sturdy basis.
Such underlay stitches for embroidery serve as a wall, providing the embroidery pattern with excellent stability.
3- Zigzag Underlay Type
These underlay stitches are often placed in sections that are 4mm thick and used with edge run underlays. Due to the broader section, some space must be filled with zigzag underlay stitches to prevent excessive pull.
4- Fill Stitch Underlay
It is a type of stitch that goes oppositely from the fill stitch, which is laid on top, and it runs back and forward.
As the name suggests, this type of stitch encompasses the entire area where we have applied other stitches for embroidery purposes. The intention of placing it in this way is to prevent the tugging of embroidery designs.
Stitch Length of Underlay
The underlay’s stitch length is primarily classified according to the type of garment being embroidered. For embroidered items, a 2.5mm stitch length is typical.
In the case of dealing with other embroidery fabrics such as vinyl, wool, leather, or chenille, you could prolong this length.
(Click here if you are interested in learning about the best embroidery fabrics)
Common Ways to Use Underlay Stitches for Fixing
A poorly positioned underlay that cannot hold the design in place is shown by the unattractive appearance of needlework projects.
For example
On the back of the jacket, you wish to embroider. Applying the running thread in a horizontal orientation will provide the fabric with better support, stabilize the area, and make it easier to apply other stitches for embroidery design.
This technique performs effectively when working with large, intricate designs that have previously been digitized d and call for several stitches for embroidery creation.
Underlay Stitches for Fixing Embroidered Cap and Hat
It is well known that caps are a difficult material to digitize and that applying stitches for embroidery purposes on caps is difficult.
(Visit our blog to find out more information about cap embroidery.)
Getting the design into the digitization software to incorporate various stitches for embroidery is the first step in digitizing the design on the six-panel cap.
Steps:
1) Start by sewing running stitches across the highest part of the design and down the center, where the seam is. However, if you apply these threads horizontally, you potentially lose a portion of the letters you’re attempting to embroider.
It is a result of how these running stitches for embroidery are used, which causes the embroidery design to be dispersed when they change position and cross the seam.
2) Apply a running stitch in a horizontal plane from the center at 10-15mm along both sides after finishing with a vertical stitch. Apply the subsequent round of 20–30mm stitches in the same manner, proceeding to add stitches for embroidery.
3) By putting stitches in this manner to the top and rear, you may obscure the curved portion of the hat and give a strong base for the digital pattern.
4) Continue to give this applied underlay a distinct shade.
Move the design both up and down while digitizing, paying attention to the stitching sequence.
5) For a smooth finish of applied stitches for embroidery creation, correlate the thread color to the hat color.
If the exposed stitches are all the same color, the exposed stitches won’t look unappealing after the stitching is complete.
How To Use Underlay In Digitizing Software?
Although some embroidery digitizing software that is readily available on the market gives you a variety of options for selecting and managing the underlays features.
However, it might be challenging for novice embroiderers to learn more about picking an underlay and the right kind of stitches for embroidery. These all call for sufficient certainty.
(Click here for more information on the top embroidery digitizing software.)
Let’s talk about how to utilize embroidery digitizing software to apply specific types of underlay stitches for embroidery and digitizing.
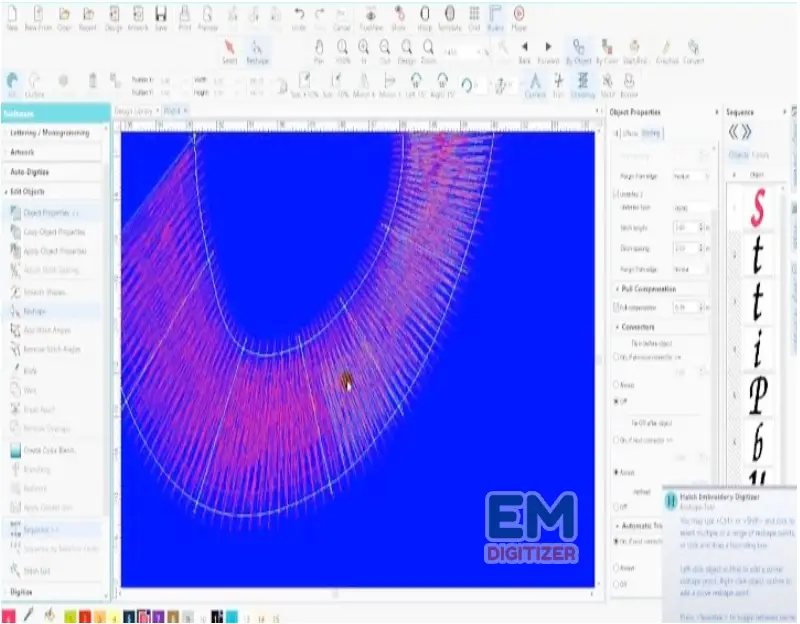
Software As Hatch Embroidery Digitizing Has an Automatic Underlay Feature
You can access a variety of Wilcom products for digitizing and embroidery. One of them that simply makes underlay stitches for embroidery designs is Hatch embroidery digitizing software.
It mainly relies on the embroidered design’s width and stitch type as determined by the fabric that you have chosen with a single tap.
Although many different software companies have the same automated underlay stitch assignment feature, they are not as smart as Wilcom hatch embroidery digitizing software.
It will let you manage offered projects with applied inferior underlay stitches. So you may achieve professional effects without digitizing the entire design by simply modifying the current stitch type.
Conclusion
To embroider your chosen fabric material, underlay stitches are used to provide a sturdy foundation for properly digitized designs. Therefore, if you want to have a bright and clear impression, it’s crucial to understand the right positioning of underlay stitches for embroidery.
Otherwise, a poorly placed underlay may shift your pattern to the incorrect side, which will impact how your embroidery design is shown overall.
I’m expecting that this post will assist you in understanding the distinctions between various underlays and how various digitizing programs handle these applied stitches for embroidery.
Underlay functions as a base point to help maintain all of the embroidery design’s components. Additionally, by reducing thickness, underlay stitches for embroidery keep your embroidery design looking nice and let you add additional layers of stitching on top of the previous ones.
- Centre run
- Edge run
- Zig-zag
- Fill stitch
1) Start by sewing running stitches across the highest part of the design and down the center, where the seam is.
2) Apply a running stitch in a horizontal plane from the center at 10-15mm along both sides after finishing with a vertical stitch.
3) By putting stitches in this manner to the top and rear, you may obscure the curved portion of the hat and give a strong base for the digital pattern.
Hatch embroidery digitizing software mainly relies on the embroidered design’s width and stitch type as determined by the fabric that you have chosen with a single tap. It will let you manage offered projects with applied inferior underlay stitches. You may achieve professional effects without digitizing the entire design by simply modifying the current stitch type.
If you have any questions leave the comments or you can visit our social channels for more updates regularly. We provide embroidery digitizing services if you need digitizing services feel free to contact us or email us.
