How To Digitize Disney Applique Design Using SewArt
Let’s talk about how to digitize your Disney applique designs with the right software. Why not SewArt? Simply load the image into your embroidery file as a raster or vector image. Applique designs are the biggest source of adding beauty to your embroidery, so in this blog post, I will show you the whole process of digitizing Disney applique designs with SewArt.
If you are looking for embroidery digitizing services, EMDigitizer is one of the best embroidery digitizing companies. Providing all types of embroidery digitizing Services. I recommend you try digitizing services.
Order NowGet Free QuoteTable of Contents
Disney Applique Designs
Applique embroidery is of great importance when you need to add personal touch either to your wardrobe to make it more stylish or to hire more customers to your embroidery business. Disney applique designs are one of those designs to be chosen for various purposes. There is a variety of Disney applique designs such as can embroider Disney fonts, Disney characters, Castel, animals(e.g, mickey mouse, elephant etc), Disney cars and more. These Disney applique designs please the people such as children and teens too. If we walk about children, they love to have such clothes embroidered by their favourite cartoon characters, paintings, animals, barbies and more. You can embroider these designs on a variety of materials such as clothing, pillows and other projects. Thanks to the embroidery machine and the software which makes that process super easy for us, you can now decorate what you want.
Here is a complete guide on how to do Reverse Appliqué Machine Embroidery
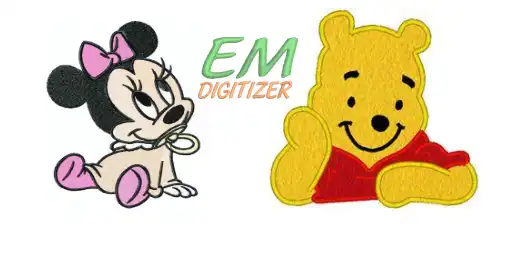
SewArt – Digitizing Disney Applique Design
Like other digitizing processes, first, we need to import the design and set the size of the design according to the area where you need to embroider. Then the next step is to trace out that design by using features of your selected software. You can digitize applique designs with SewArt.This is one inexpensive digitizing software that allows you to transform image files into embroidery files as we do in the process of digitization. SewArt offers you such automatic tools to take advantage of.
Although digitizing applique designs require more in-depth features to embroider, you can do this too from SewArt as well. People of any age love to have applique designs due to their colourful and attractive look. And adding applique embroidery to your project fascinates your customers and becomes the reason for your business expansion.
Difference Between Disney Applique Design And Simple Embroidery Design
To start the process of digitizing Disney applique design, here we need to know how applique design is different from a simple embroidery design.
Simple Embroidery Design
To create a Simple embroidery design, one makes use of the embroidery supplies to embroider the fabric. We simply import the design file format which the machine can read. Then complete stitching that design with the proper adjustment of thread and needles.
Disney Applique Designs
In Disney applique designs, stitches are incorporated into the applique fabric to the baseline and fill out the shapes with different colored stitches to add a more colorful effect. The baseline is where you intend to put the applique fabric and ensure that the fabric covered the baseline entirely and then start stitching your design.
Step By Step Process Of Digitizing Disney Applique Designs With SewArt
Let’s get started with a step-by-step illustration to digitize the Disney applique design by using SewArt.
Step 01- Start With A Blank Sheet
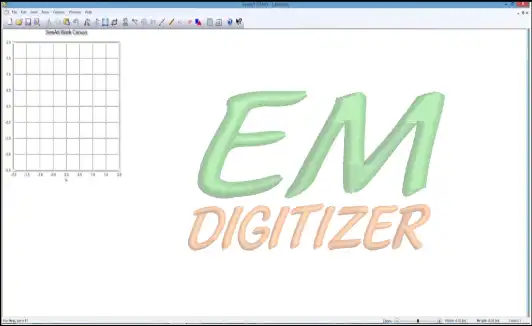
To continue digitizing Disney applique with SewArt, first of all, open the new blank page of SewArt. As we are going to create a format from the SewArt-built shapes, so you don’t need to open another file here.
Step 02- Select The Grid Option
Go to the view menu and turn the grid on to check the size of that Disney applique design you are going to create and the digitized.
Step 03- Choose The Shape According To Your Design
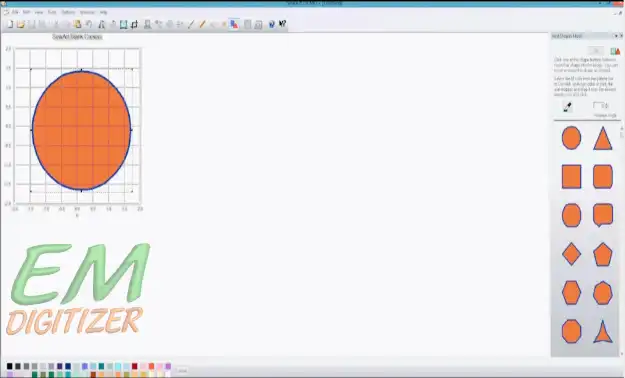
In this step of digitizing Disney applique design, you just need to select the built-in shapes given in the shape menu as per the design you intend to create. After that select the shape and then adjust its size according to the applique fabric. This is how the grid will help you to resize your Disney applique design.
Step 04- Add Colors To The Shape
Now after you have selected the desired shape to fit the Disney applique design, fill it out by choosing any solid colour. SewArt has a unique tool such as a paint bucket tool to add a desired colour to the shape. First of all, the built-in shapes of SewArt have strokes that fill out later. Paint bucket tools apply colours to the stroke and fill it with the colour you want. For this purpose, simply click on a shape to be filled and choose a colour from the paint bucket tool so that your shape will be filled out with that colour. And that shape will act as a base for Disney’s applique design.
Step 05- Apply And Select Stitch Type
At that stage, your step is to define the stitches you’re going to apply to the shape to digitize Disney applique designs. To start the process, click on the “stitches” icon on your embroidery machine to apply stitches to your design. This will get you on the screen where you can find out and select the types of stitches you want to apply to your Disney applique design.
Step 06- Set Appropriate Settings
It is a very important step to adjust the settings such as proper bordering and Stitch type (e.g, satin stitch, placement stitch, tack down stitch etc) to create the Disney applique design. After that, ensure the proper width and length of the stitches you are going to apply to the Disney applique design. If you select the lowest number for the length, stitches will get tightened. You may also observe the colour stops at specific points which shows the first round of stitching is completed here. With SewArt you can create three layers of stitching as mentioned above because we are working on an applique.
Step 07- Save The Design File
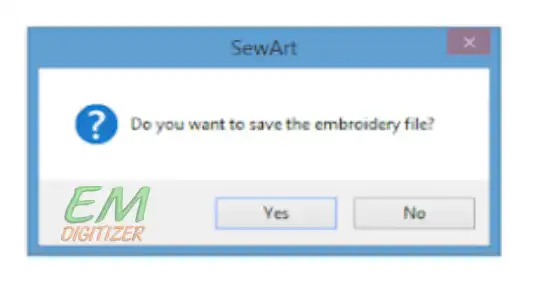
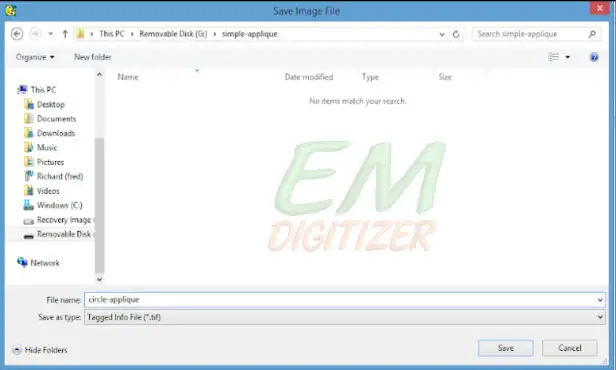
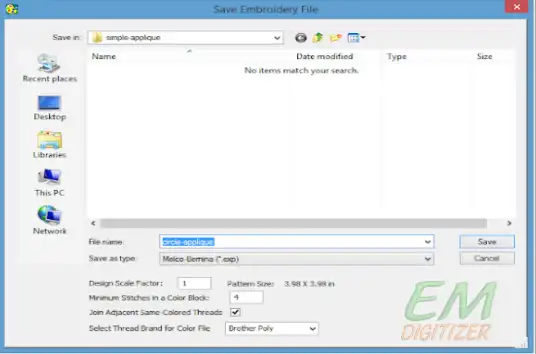
To save your Disney applique design file, you need to click on choose file>save as shown in the image below.
With SewArt, you need to save your Disney applique design as an image that is providing basing to your embroidery. Stewart chose the TIF format to save that Disney applique design by default. But you may have to choose the format that can be compressed so I chose the JPG format. Make sure to store the original file too by giving a different name to this Disney applique file. Now you have both original and modified Disney applique design files.
You may have noticed the “join adjacent same colour thread” option here. But you can leave it checked while saving your files and your thread types of stitches won’t be affected.
Step 08- Test Your Disney Applique Design
Now your Disney applique design file is ready to use. You are advised to test the design before going to stitch out on your desired material. For this sake, load the Disney applique design file into the embroidery machine and perform a test on a spare piece of fabric. It will also help you to check the quality of the stitches so you will see what your Disney applique design looks like.
Note: Trimming of fabric after every round of stitching is a good step to consider when working with applique designs.
Conclusion
This is how you will get amazing results even with the SewArt which is less expensive digitizing software. It may not have more advanced features and tools to use, but offer you enough automatic tools to create your favourite character or design on the stuff you want. If you are new to embroidery, SewArt is the best to choose to digitize your favourite Disney applique design. By following the steps, you will get mastered applying these techniques to your embroidery and that will be a great source of pleasure for your children, clients and for relatives to whom you gift this embroidered product.
What is Disney's applique design?
Applique embroidery is of great importance when you need to add personal touch either to your wardrobe to make it more stylish or to hire more customers to your embroidery business. Disney applique designs are one of those designs to be chosen for various purposes. There is a variety of Disney applique designs such as can embroider Disney fonts, Disney characters, Castel, animals(e.g, mickey mouse, elephant etc), Disney cars, and more. You can embroider these designs on a variety of materials such as clothing, pillows, and other projects.
What is the difference between Disney applique design and simple embroidery design?
Simple Embroidery Design
To create a Simple embroidery design, one makes use of the embroidery supplies to embroider the fabric. We simply import the design file format which the machine can read. Then complete stitching that design with the proper adjustment of thread and needles.
Disney Applique Designs
In Disney applique designs, stitches are incorporated into the applique fabric to the baseline and fill out the shapes with different coloured stitches to add a more colourful effect. The baseline is where you intend to put the applique fabric and ensure that the fabric covered the baseline entirely and then start stitching your design.
How can we digitize applique designs with SewArt?
This is one of the least expensive digitizing software that allows you to transform image files into embroidery files as we do in the process of digitization.SewArt offers you such automatic tools to take advantage of. Although digitizing applique designs require more in-depth features to embroider, you can do this too from SewArt as well.
What are the basic steps to digitize Disney applique design with SewArt?
Step 01- Start with a blank sheet
Step 02- Select the grid option
Step 03- Choose a suitable shape for your design
Step 04- Add colours to your shape
Step 05- Select Stitch type
Step 06- Adjust settings
Step 07-Save the design file
Step 08-Test the design first on spare fabric
If you have any questions leave the comments or you can visit our social channels for more updates regularly. We provide embroidery digitizing services if you need digitizing services feel free to contact us or email us.
